I found a tune called Angeline the Baker in a book called “The Fiddler’s Fakebook” left over from my aborted attempt at learning to play the violin/fiddle. I never got rid of the book because I love a lot of the music in there and find it enjoyable to play on the guitar.
My recording of “Angeline the Baker” is an arrangement I created of an old time fiddle tune based on a song called Angelina Baker written by Stephen Foster for the Christy Minstrels, and published in 1850. The original laments the loss of a woman slave, sent away by her owner. The melody of the fiddle tune, Angeline the Baker differs from the Stephen Foster version.
In my arrangement and instrumentation in this recording I spiced it up and added a bit of country flavor! See my music page to buy a copy of Angeline the Baker.
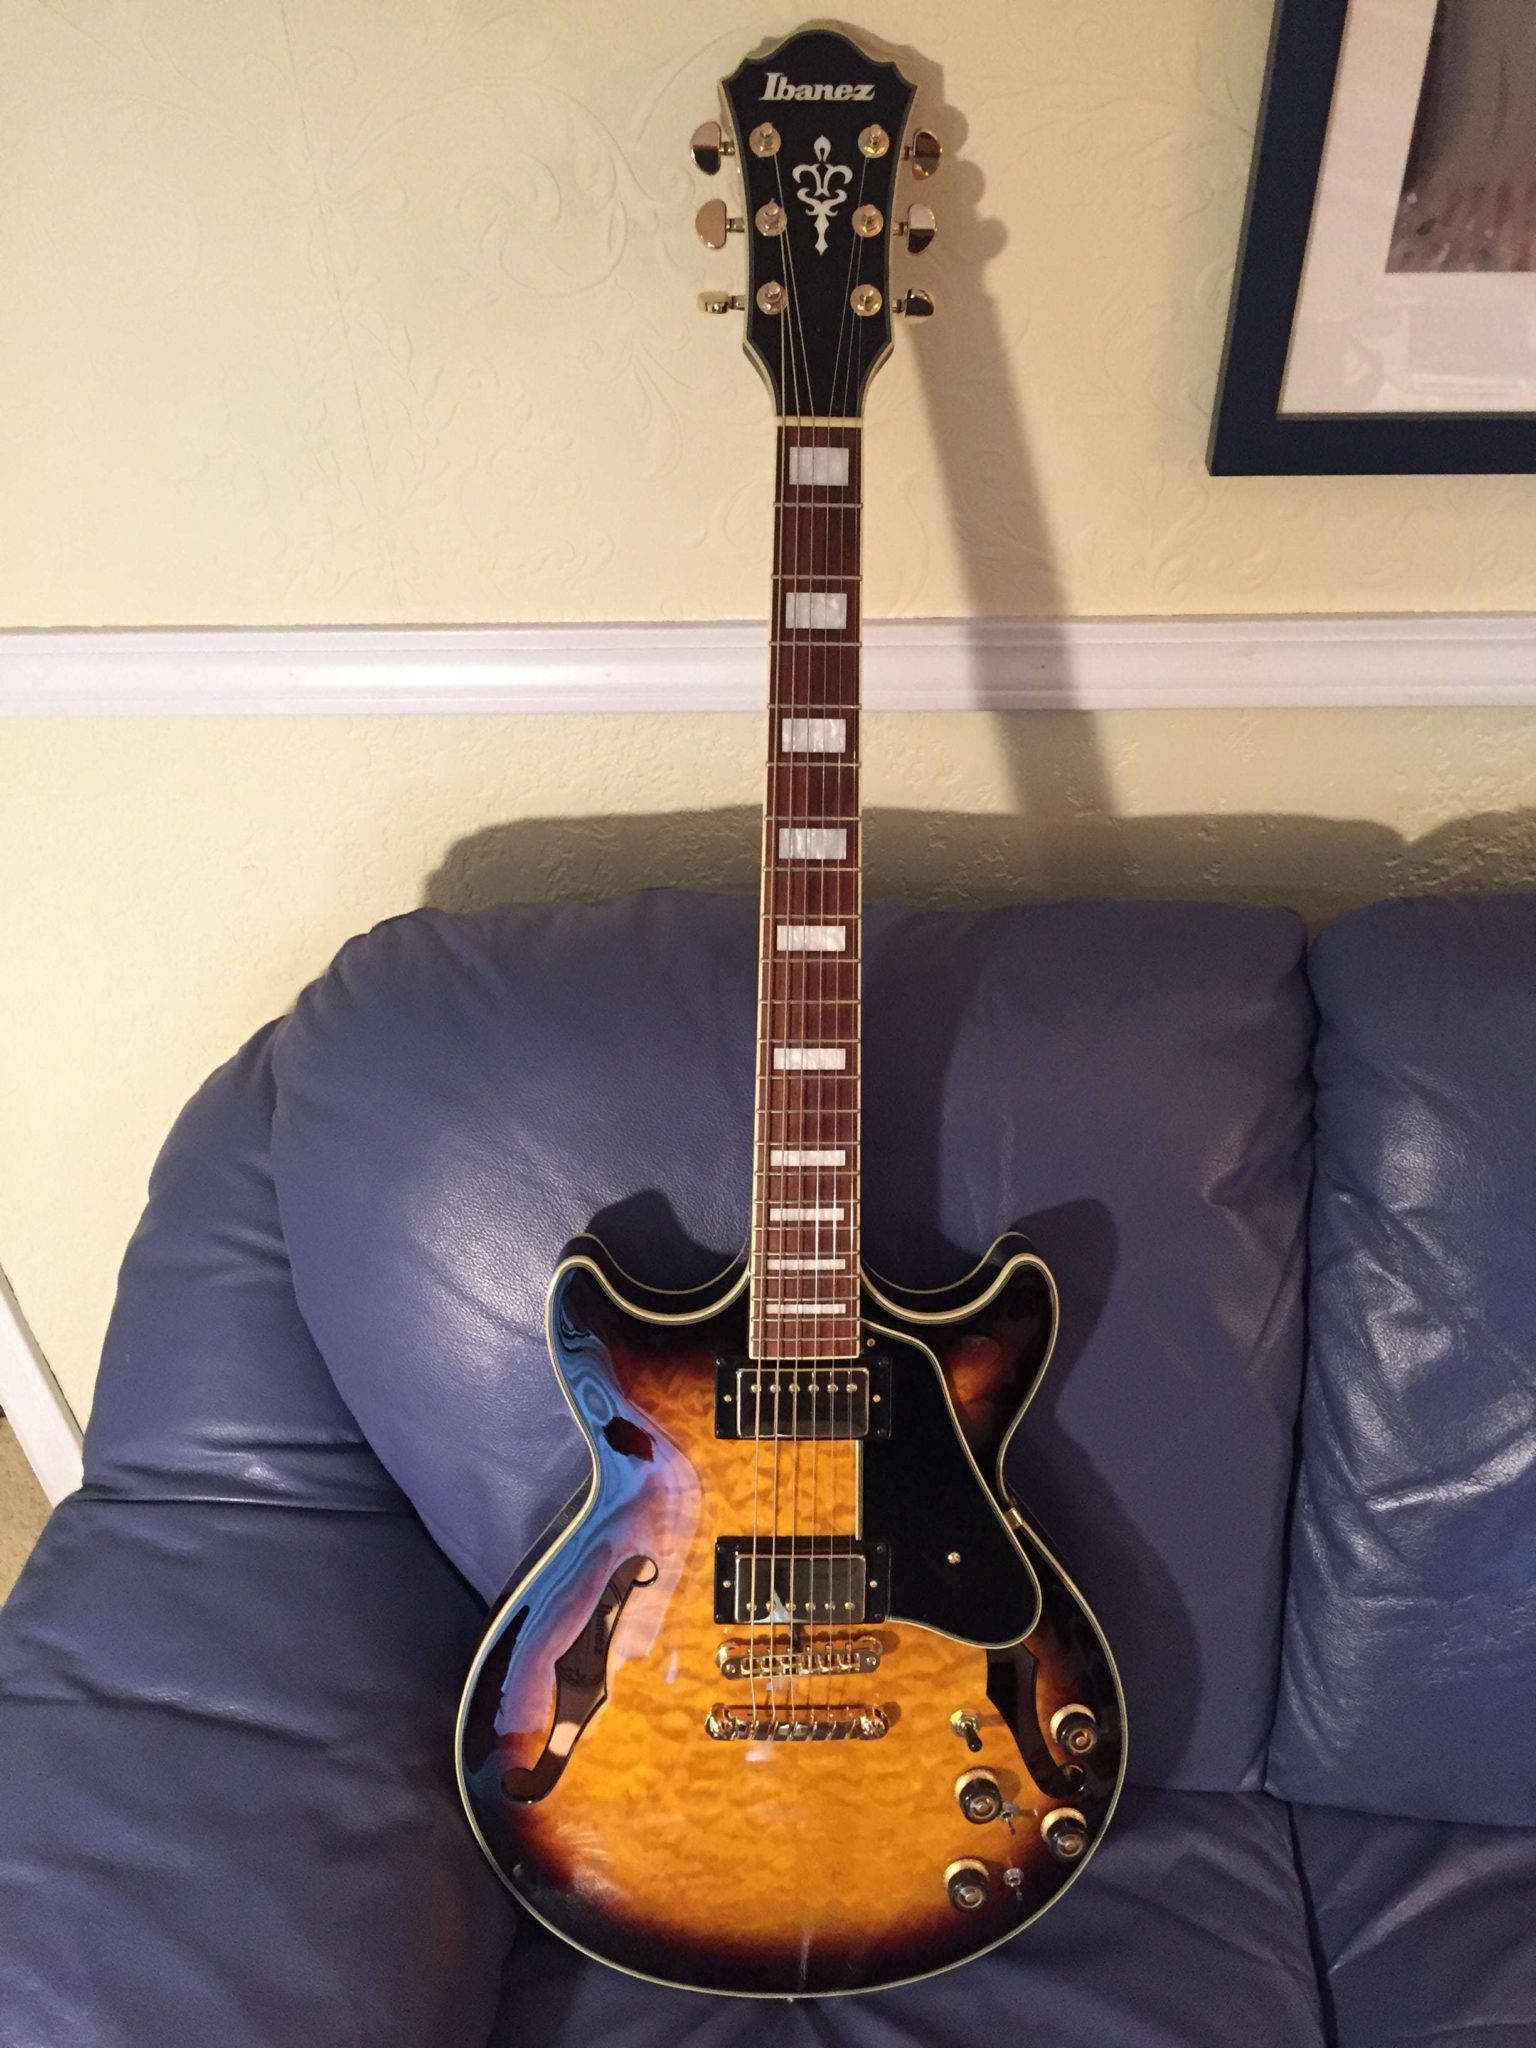
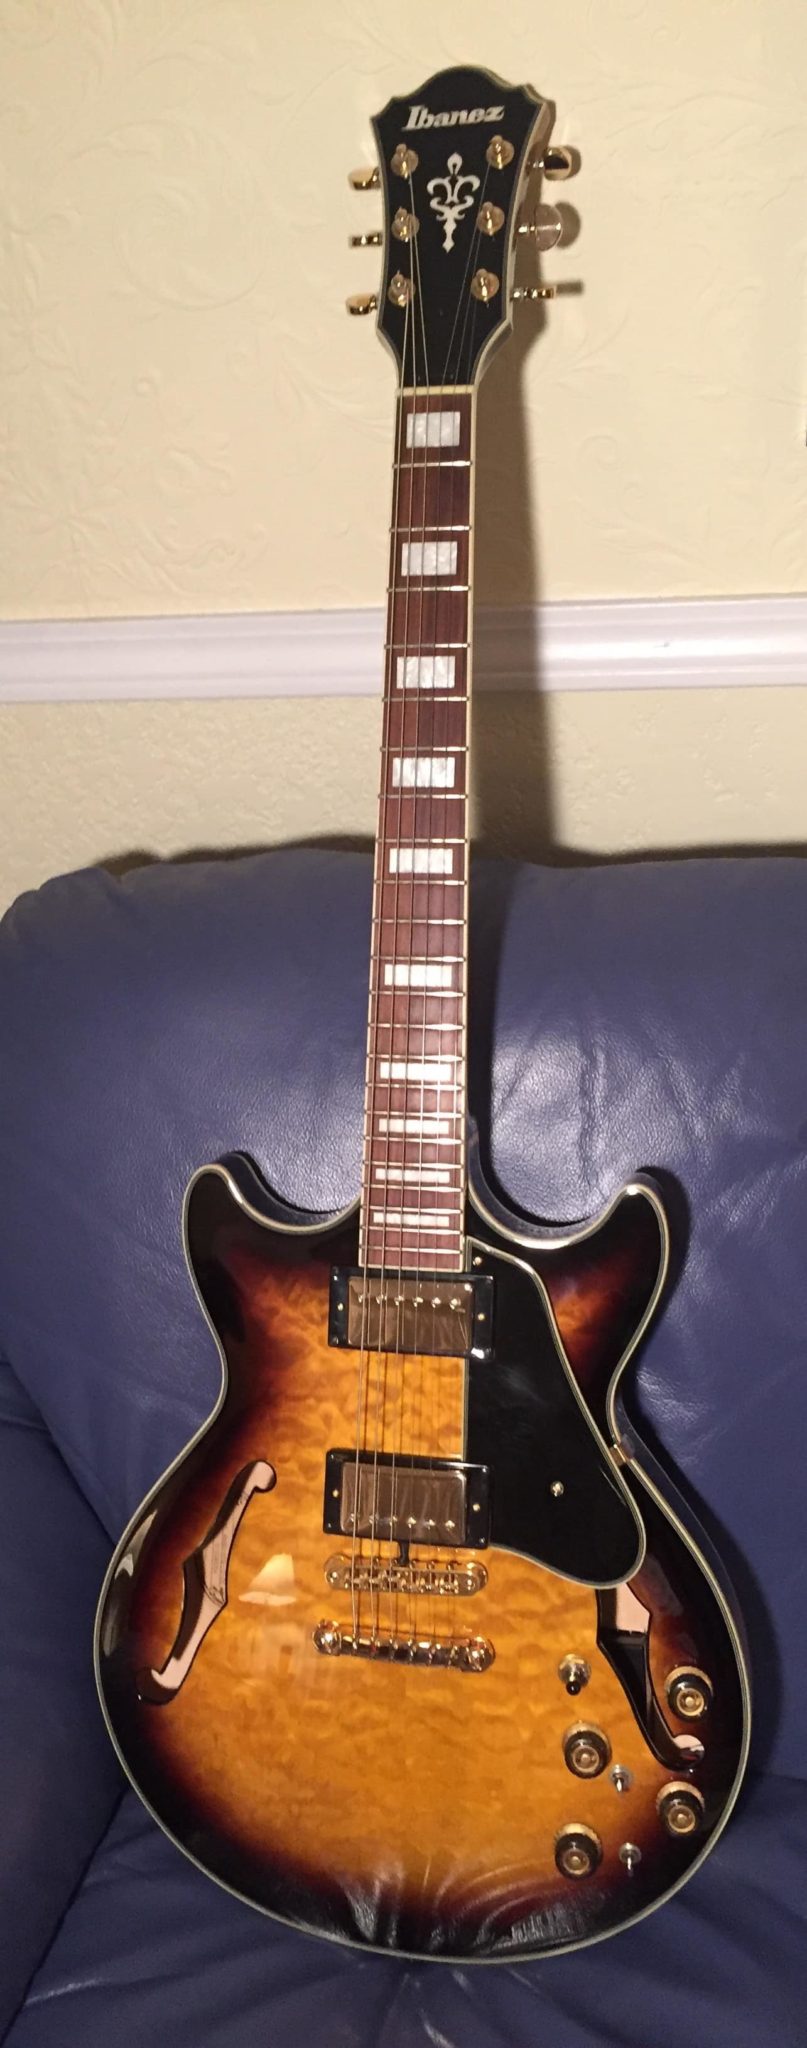
Here’s my recap of my process of upgrading my Ibanez Artcore Expressionist AM93 semihollowbody guitar with new RMC Pow’r Bridge ‘G’ pickups in the bridge along with the Poly-Drive 1 electronics module and all new control wiring.
Watch The Video
Overview
The synth access equipped guitars on the market, for example such as those available from Godin (LGX-SA and LGXT-SA) or Carvin (Frank Gambale FG1) were very attractive to me but cost more than I wanted to spend on a guitar. Besides I love working on things so I decided to do this upgrade myself and document what I did in case anyone else wants to give it a try too. I had already had a few years experience using the Roland GK-3 external mount pickup on my Epiphone “dot”, which worked great, but it was big and ugly. Sure, beauty is in the eye of the beholder, buy in my beholder eyes I decided I didn’t like it. Also, I had moved on to the smaller body (ES-339 style) Artcore AM93 and I wanted to keep it as stock looking as possible while still being able to enjoy synth access.
Perhaps the biggest challenge was the bridge. The RMC “PBG pickup saddles” retro-fit the Schaller GTM (Nashville) bridge as well as the TonePros TP-6 bridge, but they don’t fit in the Gotoh tune-o-matic bridges because the intonation screws are too high in the Gotohs. The bridge in the Artcore is called by Ibanez the Art-1 bridge and I don’t know who makes it, but I took measurements and determined that the RMC pickups would not fit. In the end, I decided to buy a Schaller GTM bridge, but the main problem was that the Schaller bridge posts/bushings were smaller than the Artcore bridge posts. I fashioned wood plugs for the holes and drilled them out to fit the new Schaller posts. This required very careful measuring and rechecking. Once it was verified I glued them in with Titebond hide glue. Be careful to wipe up any excess glue from the guitar finish!
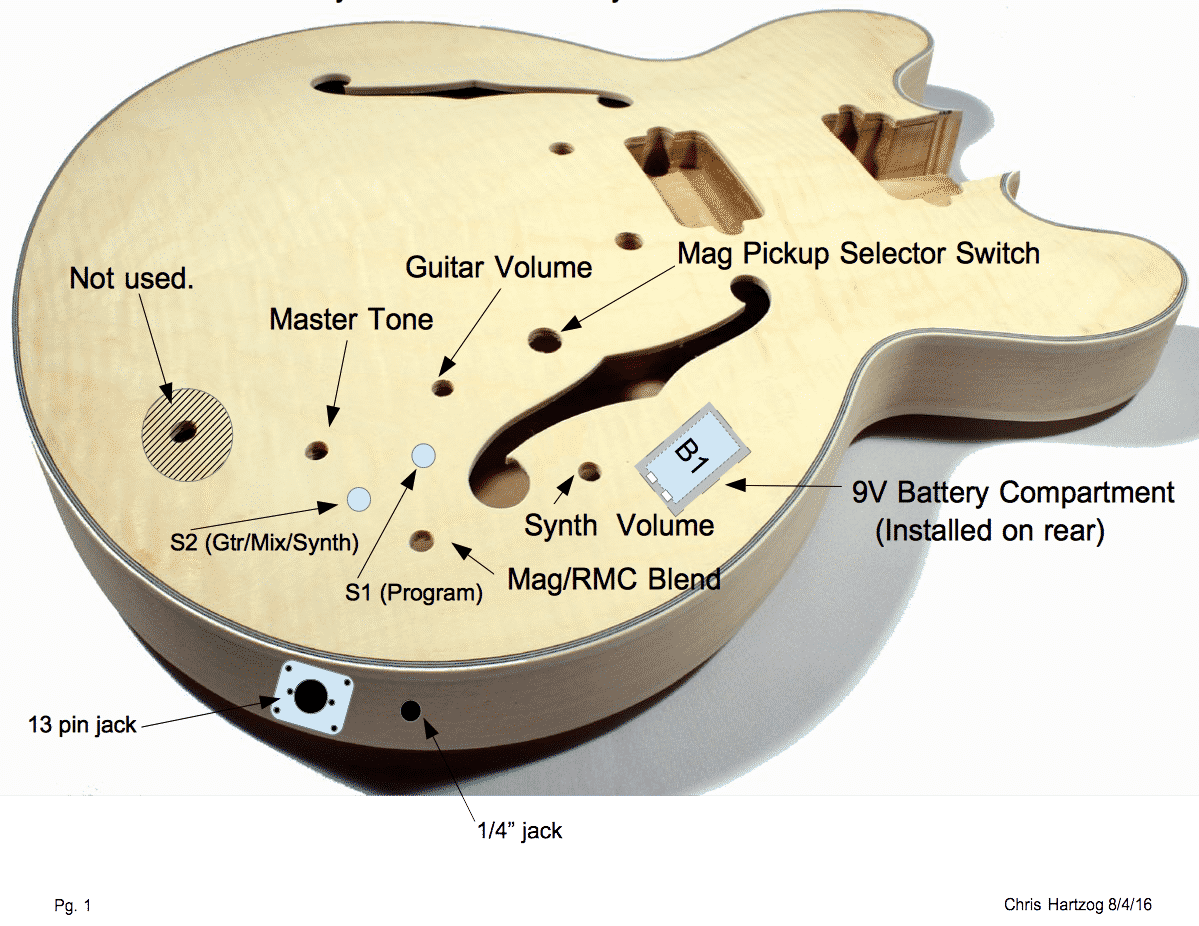
Before beginning any work, I carefully planned what I would do. Below is a copy of my proposed control layout diagram. I couldn’t find graphic of a blank Artcore body online, so I went with this one and about the only major difference is the extra hole on the top for the ¼ inch output jack which is on the side on the Artcore.
I also did my own wiring diagram that would be specific to my particular guitar. My install included what RMC calls the “Cool Circuit” which provides a master tone, guitar volume, synth volume and RMC/Mag pickup blend control.
Procedure
1 Bridge Post Hole Retrofit For Schaller Gtm Bridge
Remove guitar strings. I discarded the factory strings as I had new D’Addario NYXL strings that I wanted to install when I was done.
Remove stop bar. (It will actually slide off its posts as soon as you remove the strings.)
Remove stock bridge. Set it aside until you are ready to replace the saddles with the RMC pickups.
Extract stock bridge bushings. Place a short screw or bolt in the bushing hole and then tighten the bushing against the screw until the bushing lifts out of the hole.
Measure bridge post hole diameter and depth.
ID:
Depth:
Fabricate post hole plugs:
OD: 17/64”
Length:
ID of Schaller bushing:
Verify Schaller bushings fit in the fabricated post hole plugs.
Re-verify post hole depth and plug length:
Depth:
Plug Length:
Hole spacing:
Install plugs and glue in place.
Press in Schaller bushings.
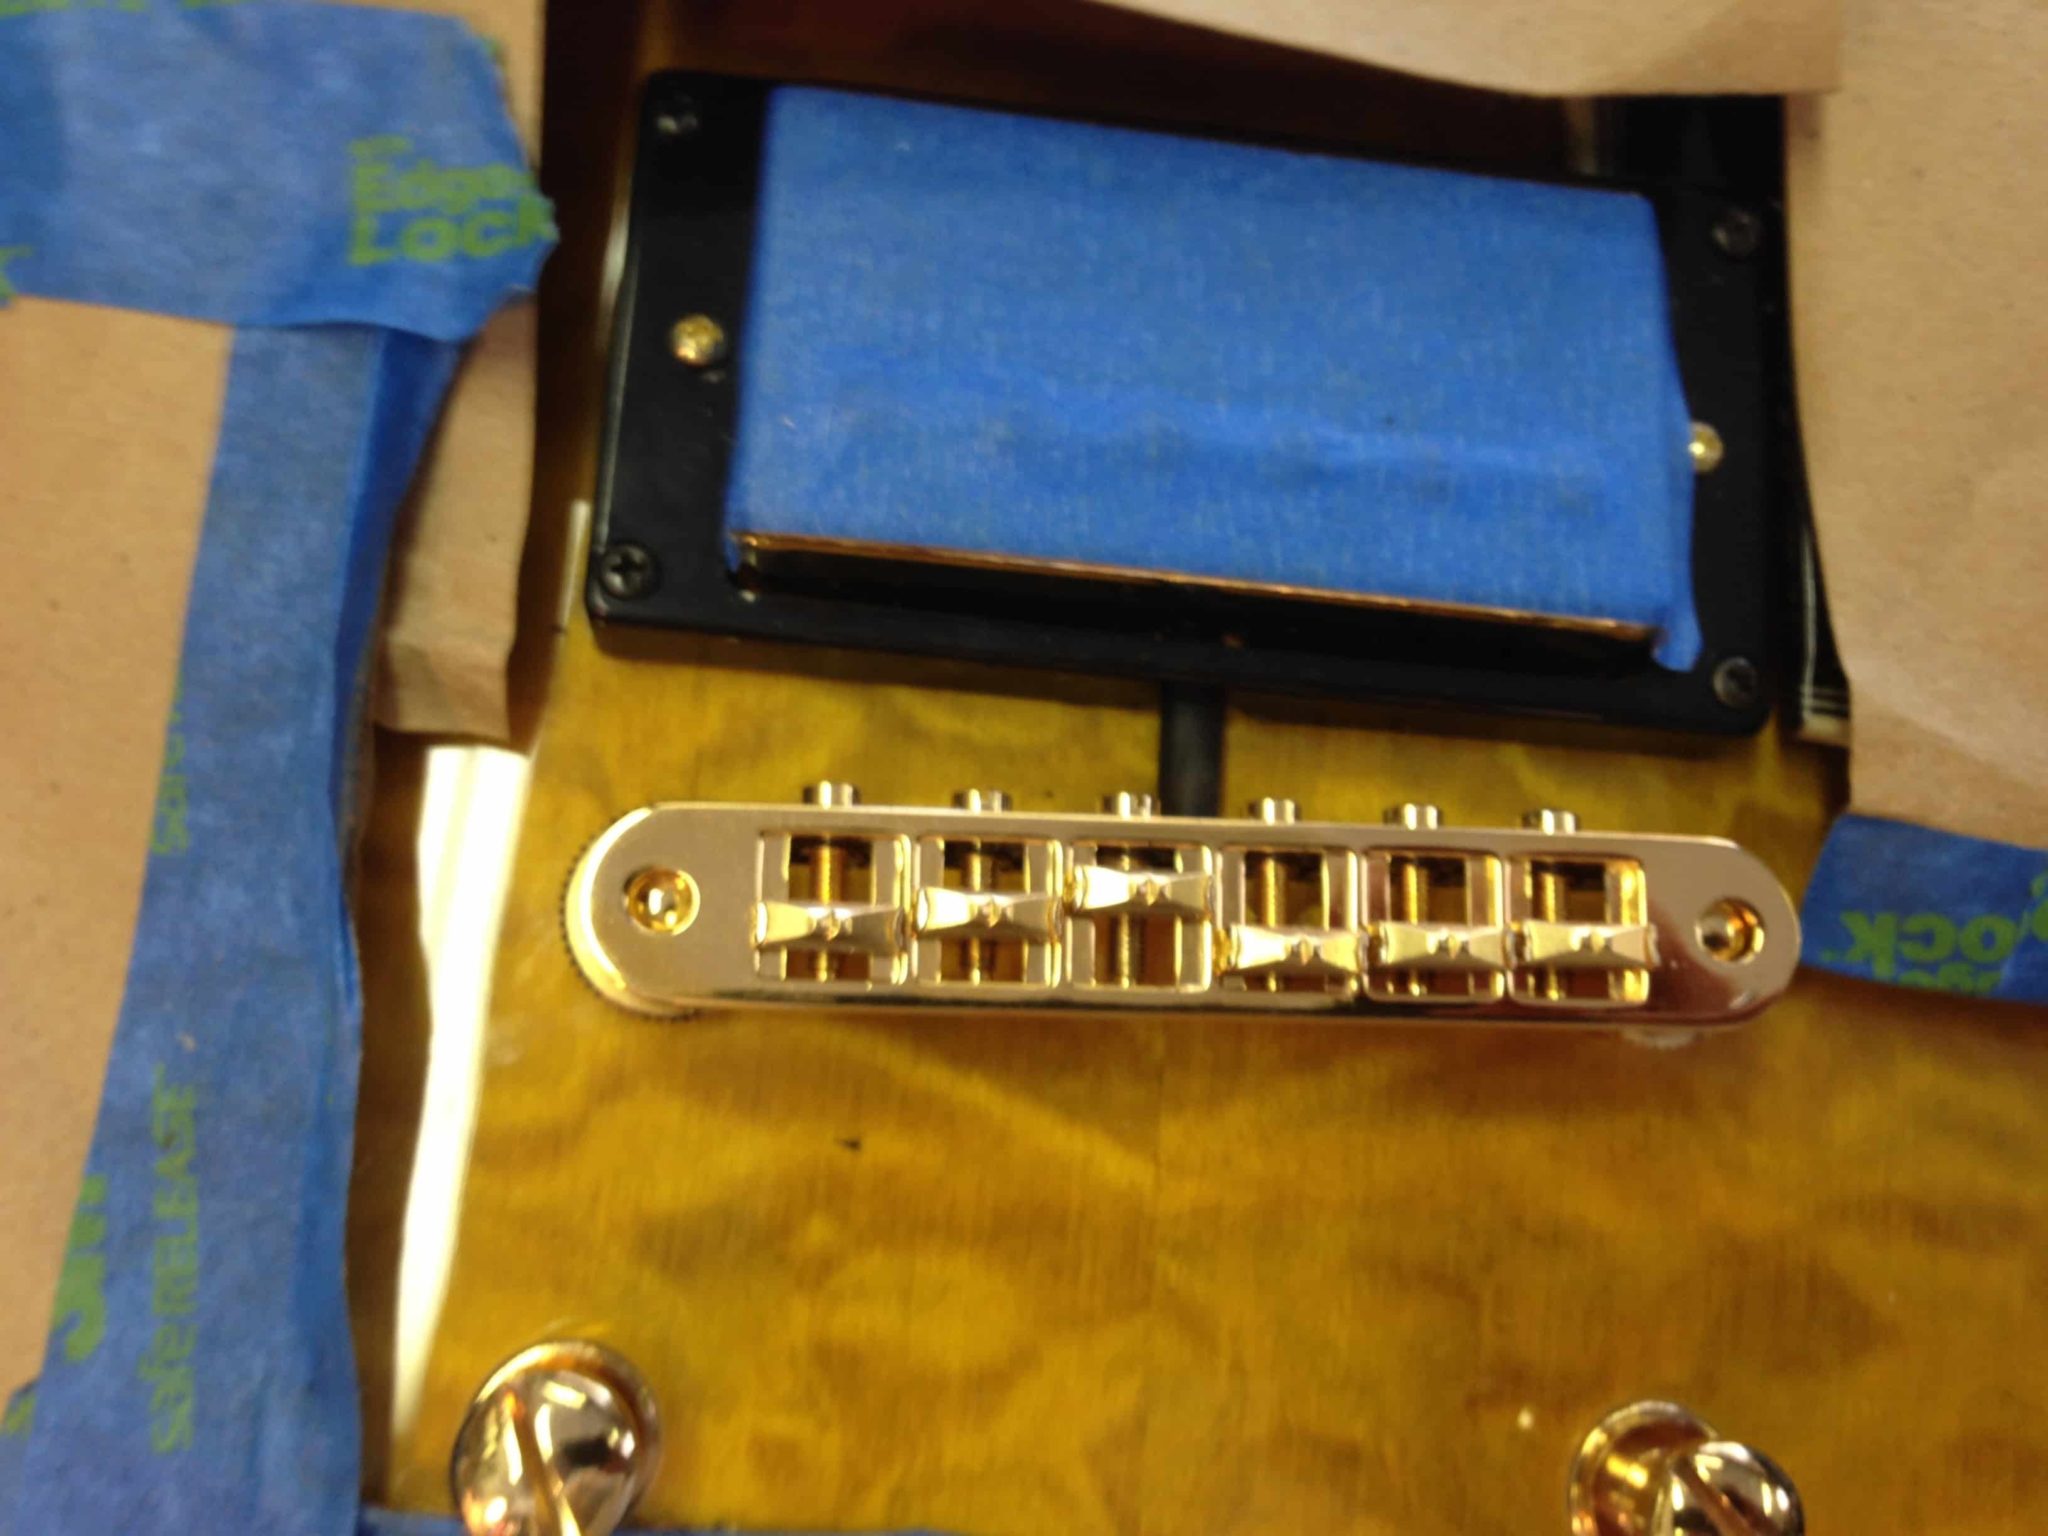
2 Bridge Saddle Replacement
Remove and replace bridge saddles with RMC saddles per RMC instructions.
Remove bridge pickup and move it out of the way.
Install Schaller bridge.
Route pickup cables into guitar body.
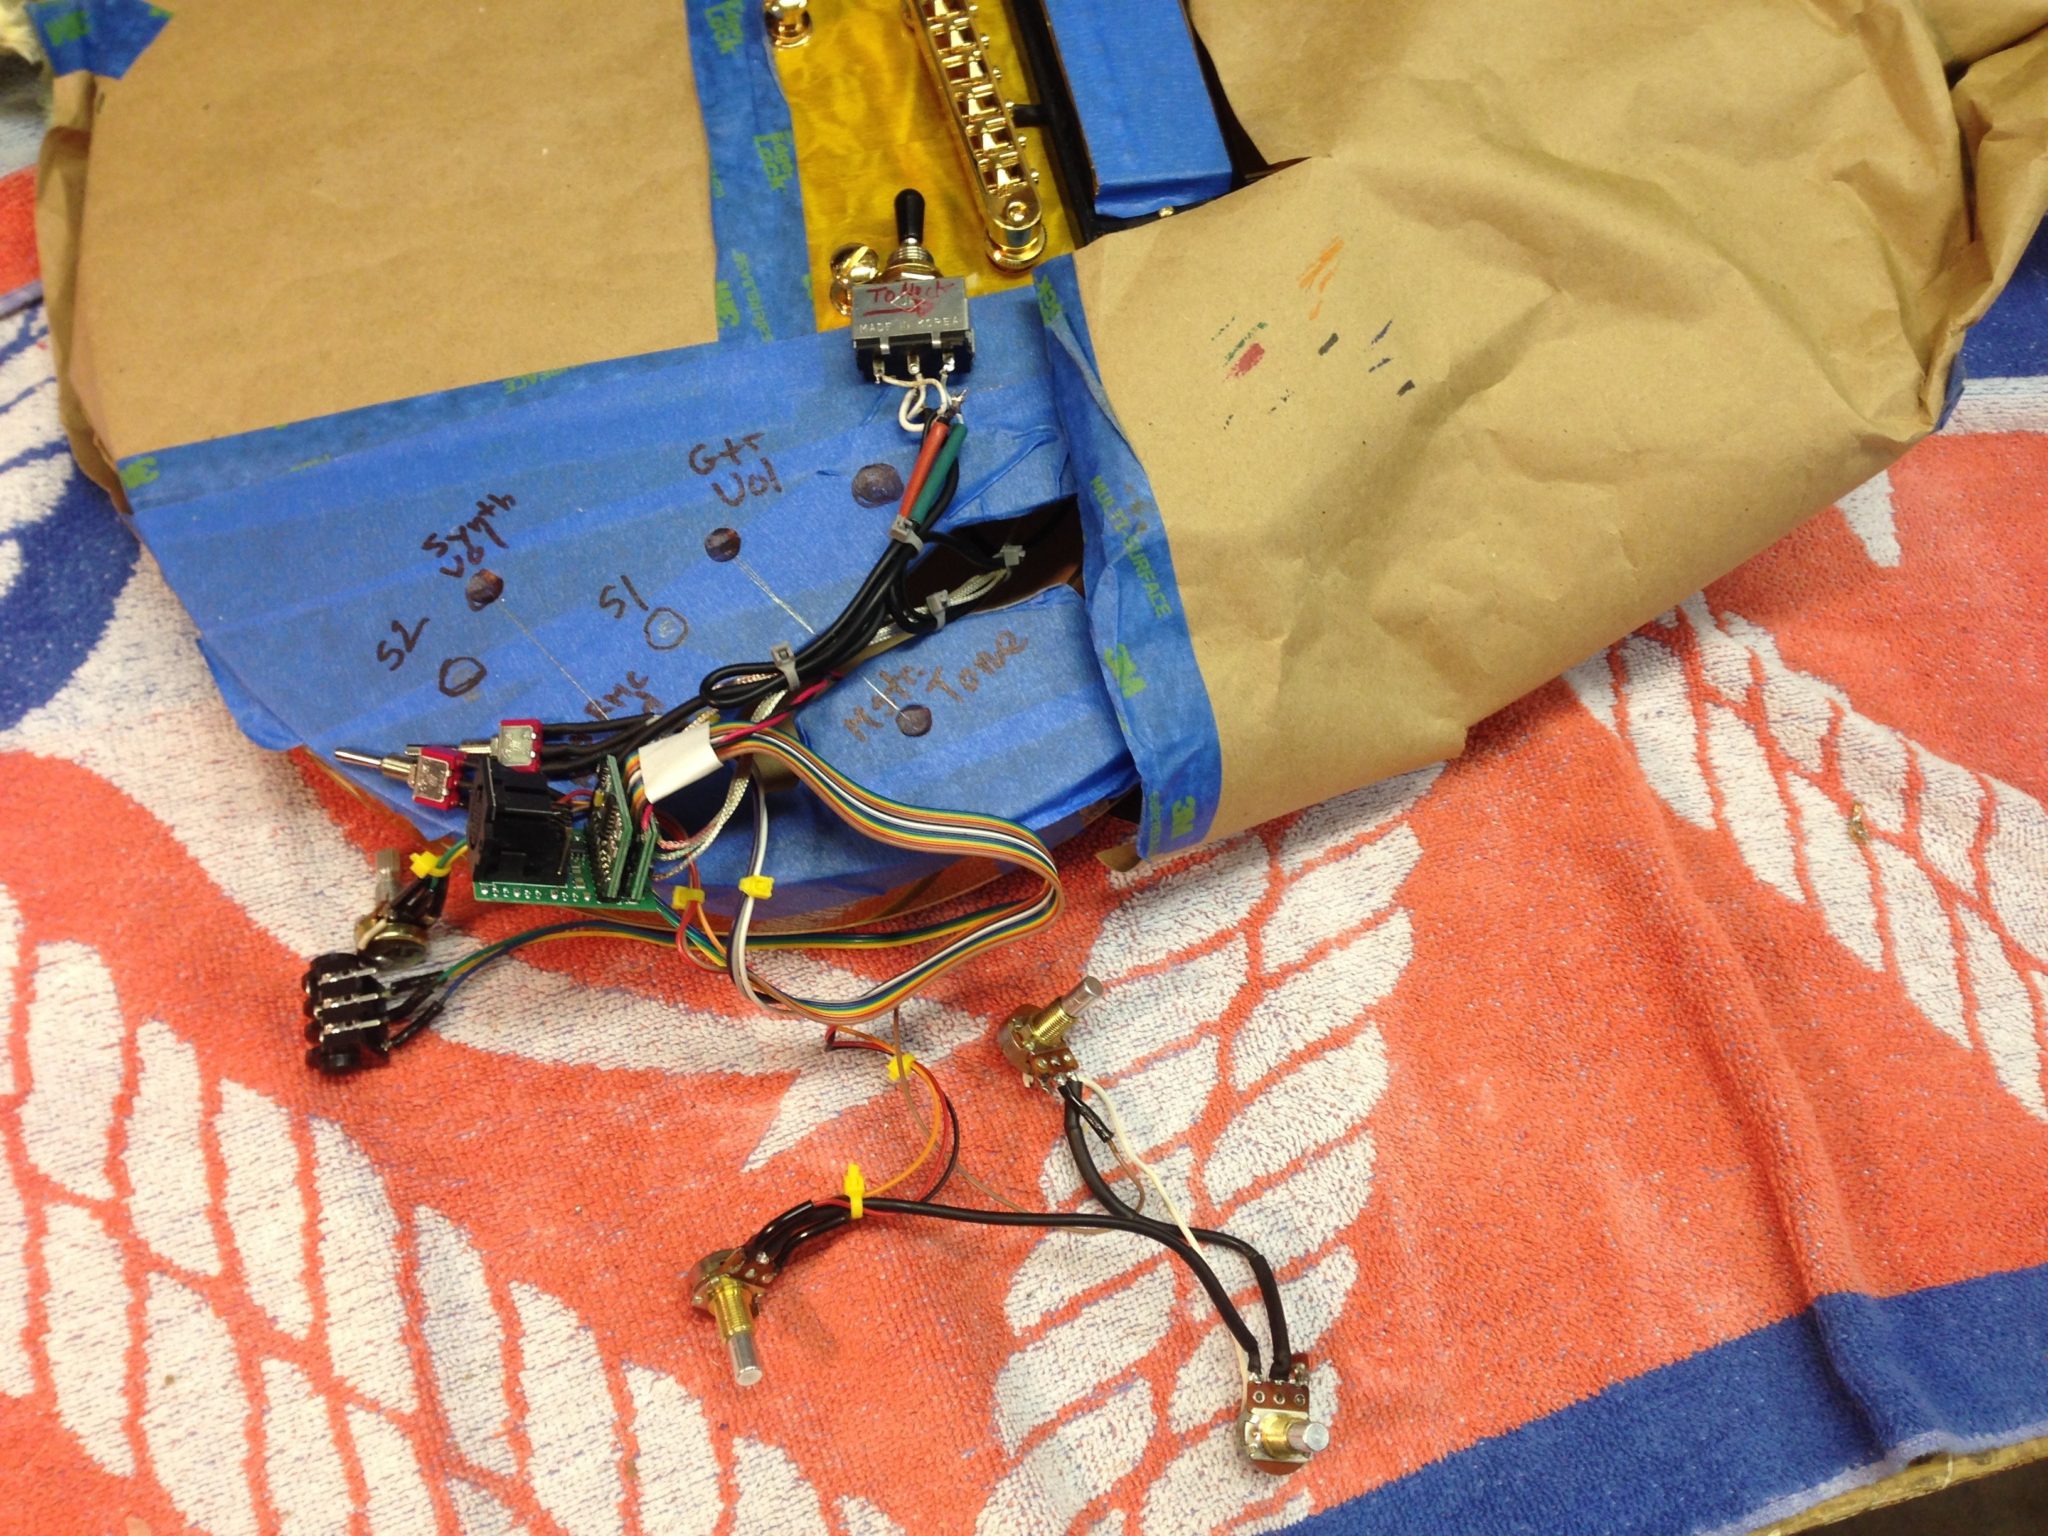
3 RMC Wiring connections
Remove the volume and tone knobs. Tip of the hat to Sweetwater’s Insync for the helpful suggestion to employ the tip of a spoon as a lever to pry the knob up. Be sure to protect the finish with a cloth or napkin and pry gently.
Remove the nuts and washers from the volume and tone pot stems, the pickup switch and the ¼ inch jack. (Save them in case you need an extra nut or washer later.)
Remove all stock wiring through bottom F-hole:
Volume and tone pots. (Label the pickup wires)
¼” guitar jack
Pickup selector switch
Discard pots and ¼” jack.
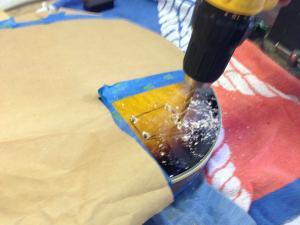
Mark and drill holes for S1 and S2.
Drill size:
Mark and cut opening for the battery box. (Note: it is not shown here, but I applied masking tape first over the areas where I needed to cut into the guitar to avoid chipping the nearby finish.)
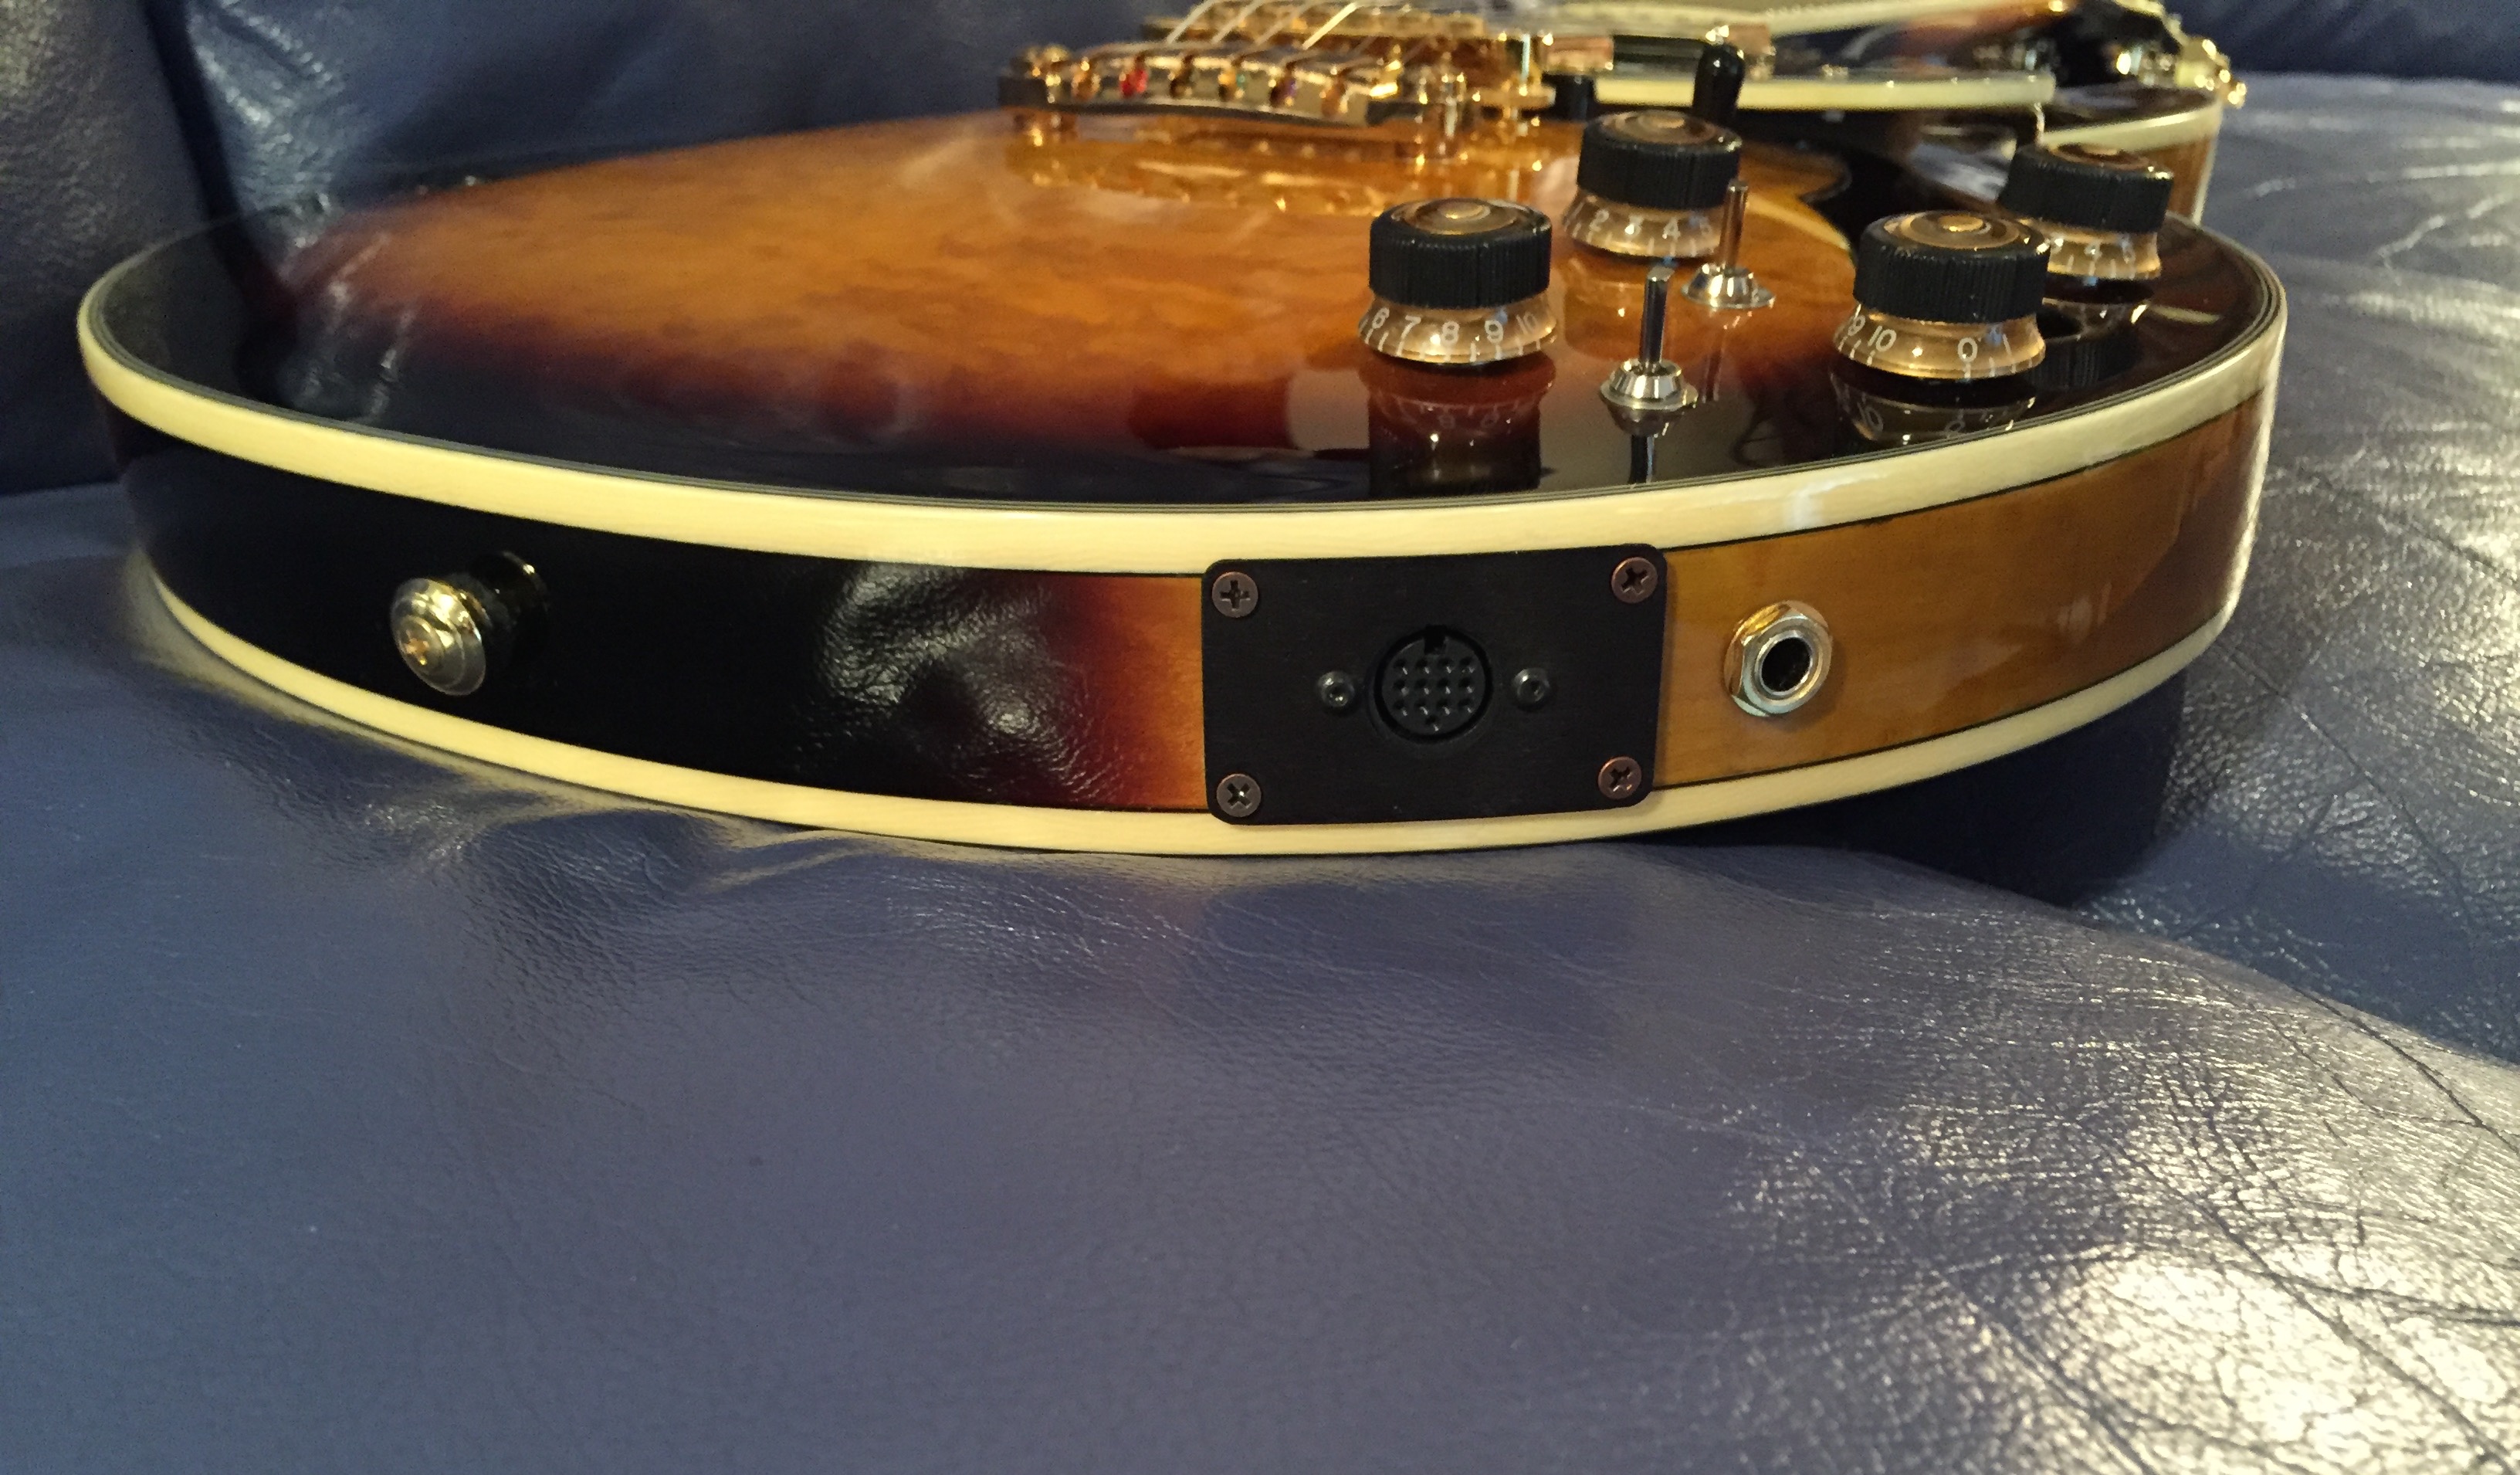
Mark side for jackplate opening.
Make template for jackplate opening cutting/routing.
Cut/route side opening for jackplate.
Connect mag pickups to selector switch.
Connect all Poly-Drive wires per RMC drawing.
Connect mag pickup ground wires to Poly-Drive module per RMC drawing.
Connect pickup selector switch to Poly-Drive module.
Connect RMC pickup wires to Poly-Drive module per RMC drawing.
Add cable tie down to secure inside guitar.
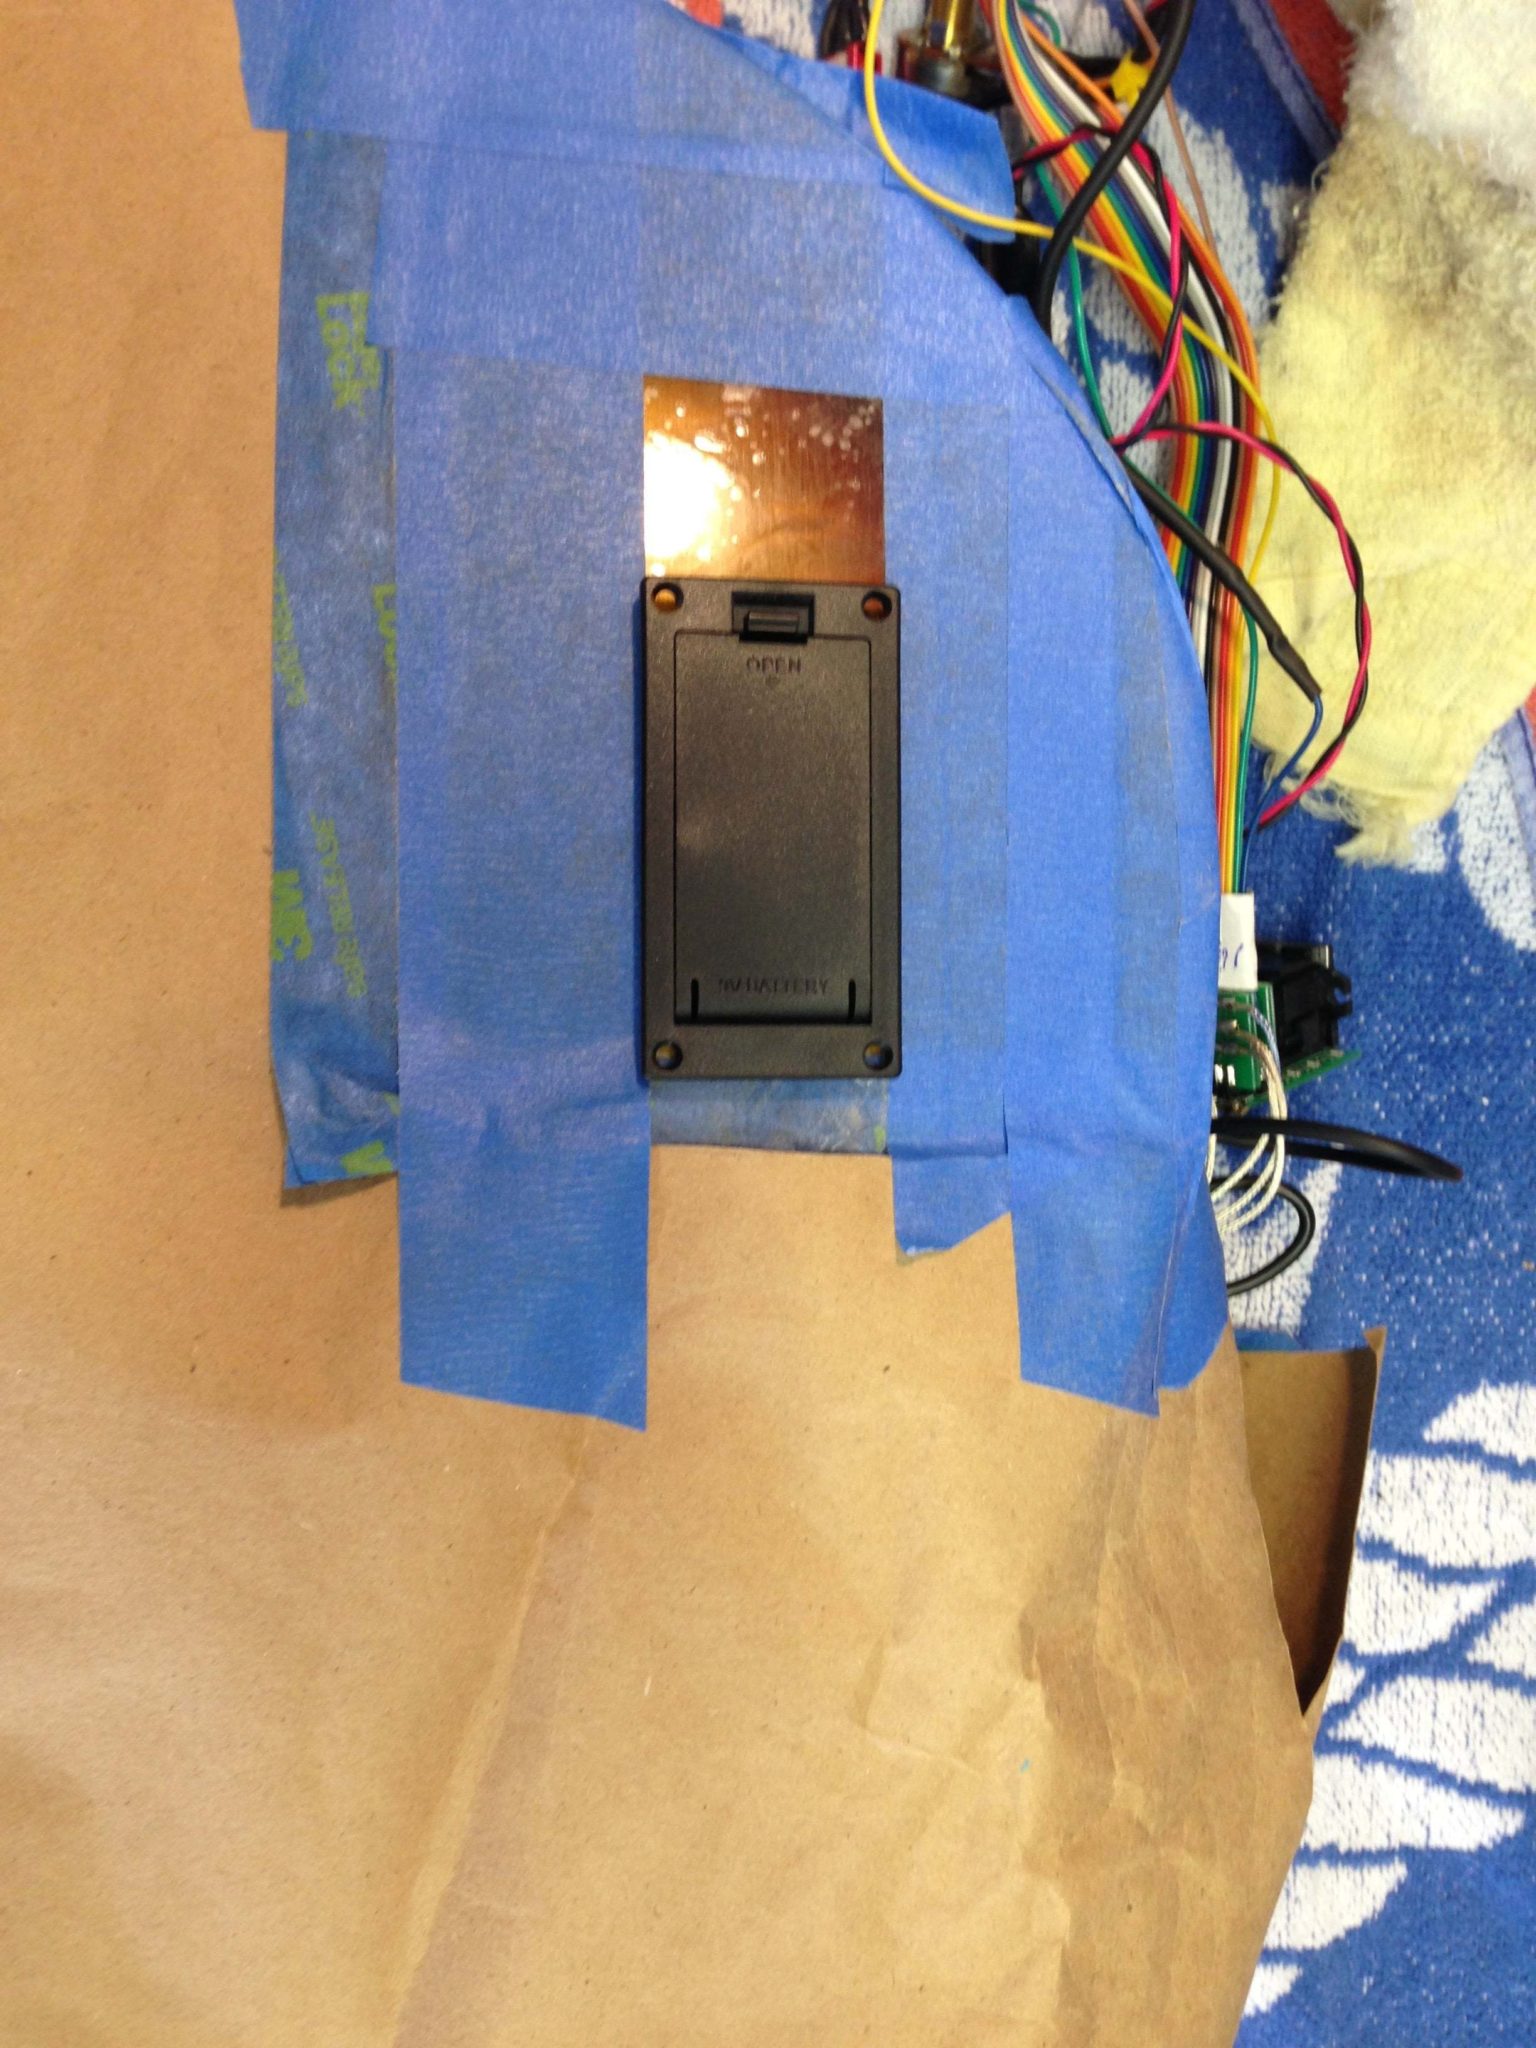
Route battery wires to battery box.
4 RMC Wiring Harness Installation
Insert Poly-Drive module and ¼” jack through F-hole.
Attach module with two screws and ¼” jack with nut to dual jackplate.
Attach jackplate to guitar with screws.
Attach all pots and switches.
Connect battery wires to battery box.
Secure internal wires to guitar interior.
Reinstall bridge pickup.
Install strings.
Tune and check string action and intonation.
Install 9V battery.
Test all functionality:
S1: Changes GR-55 programs?
S2 = Gtr + connect ¼” to amp: Mag pickups work?
S2 = Synth + 13 pin to GR-55: RMC pickups work?
S2 = Mix: Both pickups work?
Guitar volume works?
Master tone works?
Mag/RMC blend works?
Polish guitar.
Create GK Set in GR-55 with setting applicable to RMC piezo pickups.
My new Ibanez Artcore Expressionist AM93 (Thanks Sweetwater!) with my added RMC Poly-Drive 1 electronics (Thanks Richard McClish & RMC Pickups!) for Roland GR-55 synth access. Ahhhh…. Can’t wait to start playing it nonstop! ??
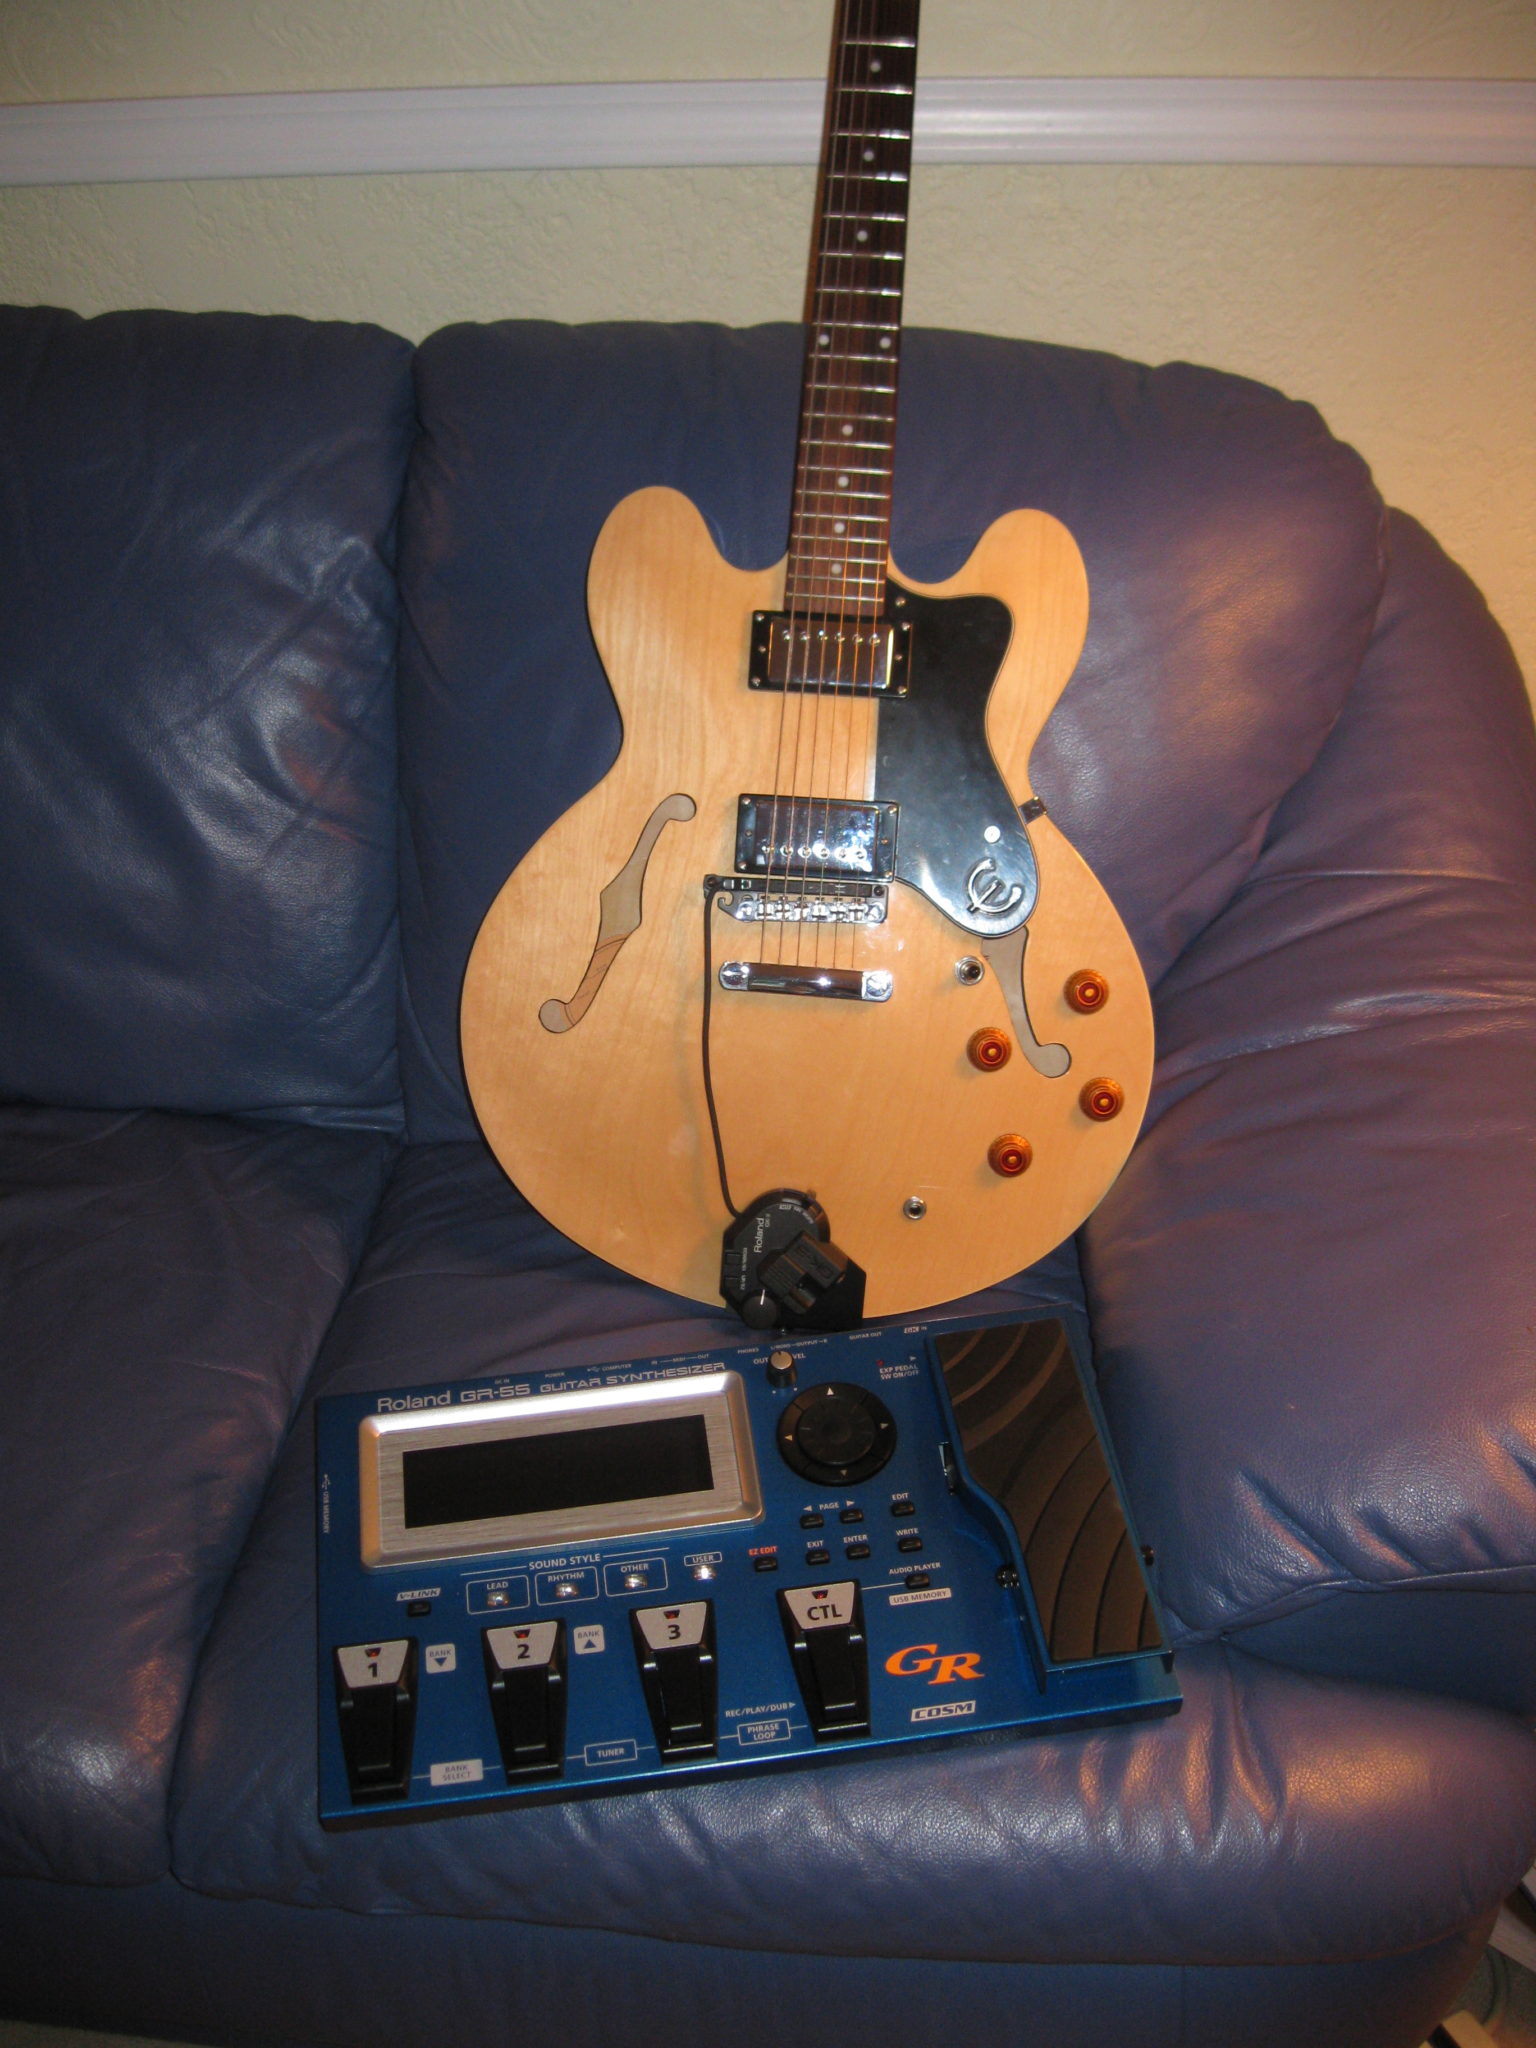
Epiphone Dot guitar with Roland GK-3 pickup and GR-55 guitar synthesizer
This post is to summarize how to install the Roland GK-3 Divided Pickup on a semi-hollowbody guitar, like my Epiphone Dot.
About the Roland GK-3 Divided Pickup
The Roland GK-3 Divided Pickup is what you need to play guitar through a Roland guitar synth, such as the awesome new GR-55 (which I just purchased) or the GR-20. The GK-3 is easier to install than you would think from first glance at the owner’s manual.
The GK-3 includes an adjustable curve design to keep an even distance between the strings for better response. The clever attachment plate lets the GK mount right to the bridge screws of Les Paul style guitars. The guitar connection is 1/4 in. to 1/4 in., and the pick up wire retracts for a neat installation.
The Roland GK-3 Divided Pickup is for sending individual signals from each guitar string to GK compatible devices. It is carefully designed for guitar performance by having a large GK knob, and a Select Switch to change from synth, to normal guitar tone, or both of them mixed.
Following these instructions, if you play a Les Paul-type or Gibson semi-hollowbody type guitar you can safely install the Roland GK-3 Divided Pickup without any drilling by using an included special attachment plate.
Roland GK-3 Divided Pickup Specifications
Controls
GK Volume
DOWN/S1 Switch
UP/S2 Switch
Select Switch
Indicator
Power Indicator
Connectors
GK Connector
Normal Pickup Input Jack
Roland GK-3 divided pickup installation
Here is my photo journal of my process of attaching the Roland GK-3 divided pickup (which came with my AWESOME, new GR-55 Guitar Synthesizer, of which I will write about later) to my Epiphone Dot semi-hollowbody guitar. This is the process described in the owner’s manual under “Attaching the Pickup with the Pickup Holder” and it should work for other guitars with the bridge mounted on posts embedded in the guitar body, such as a Les Paul. This method won’t work for a Strat.
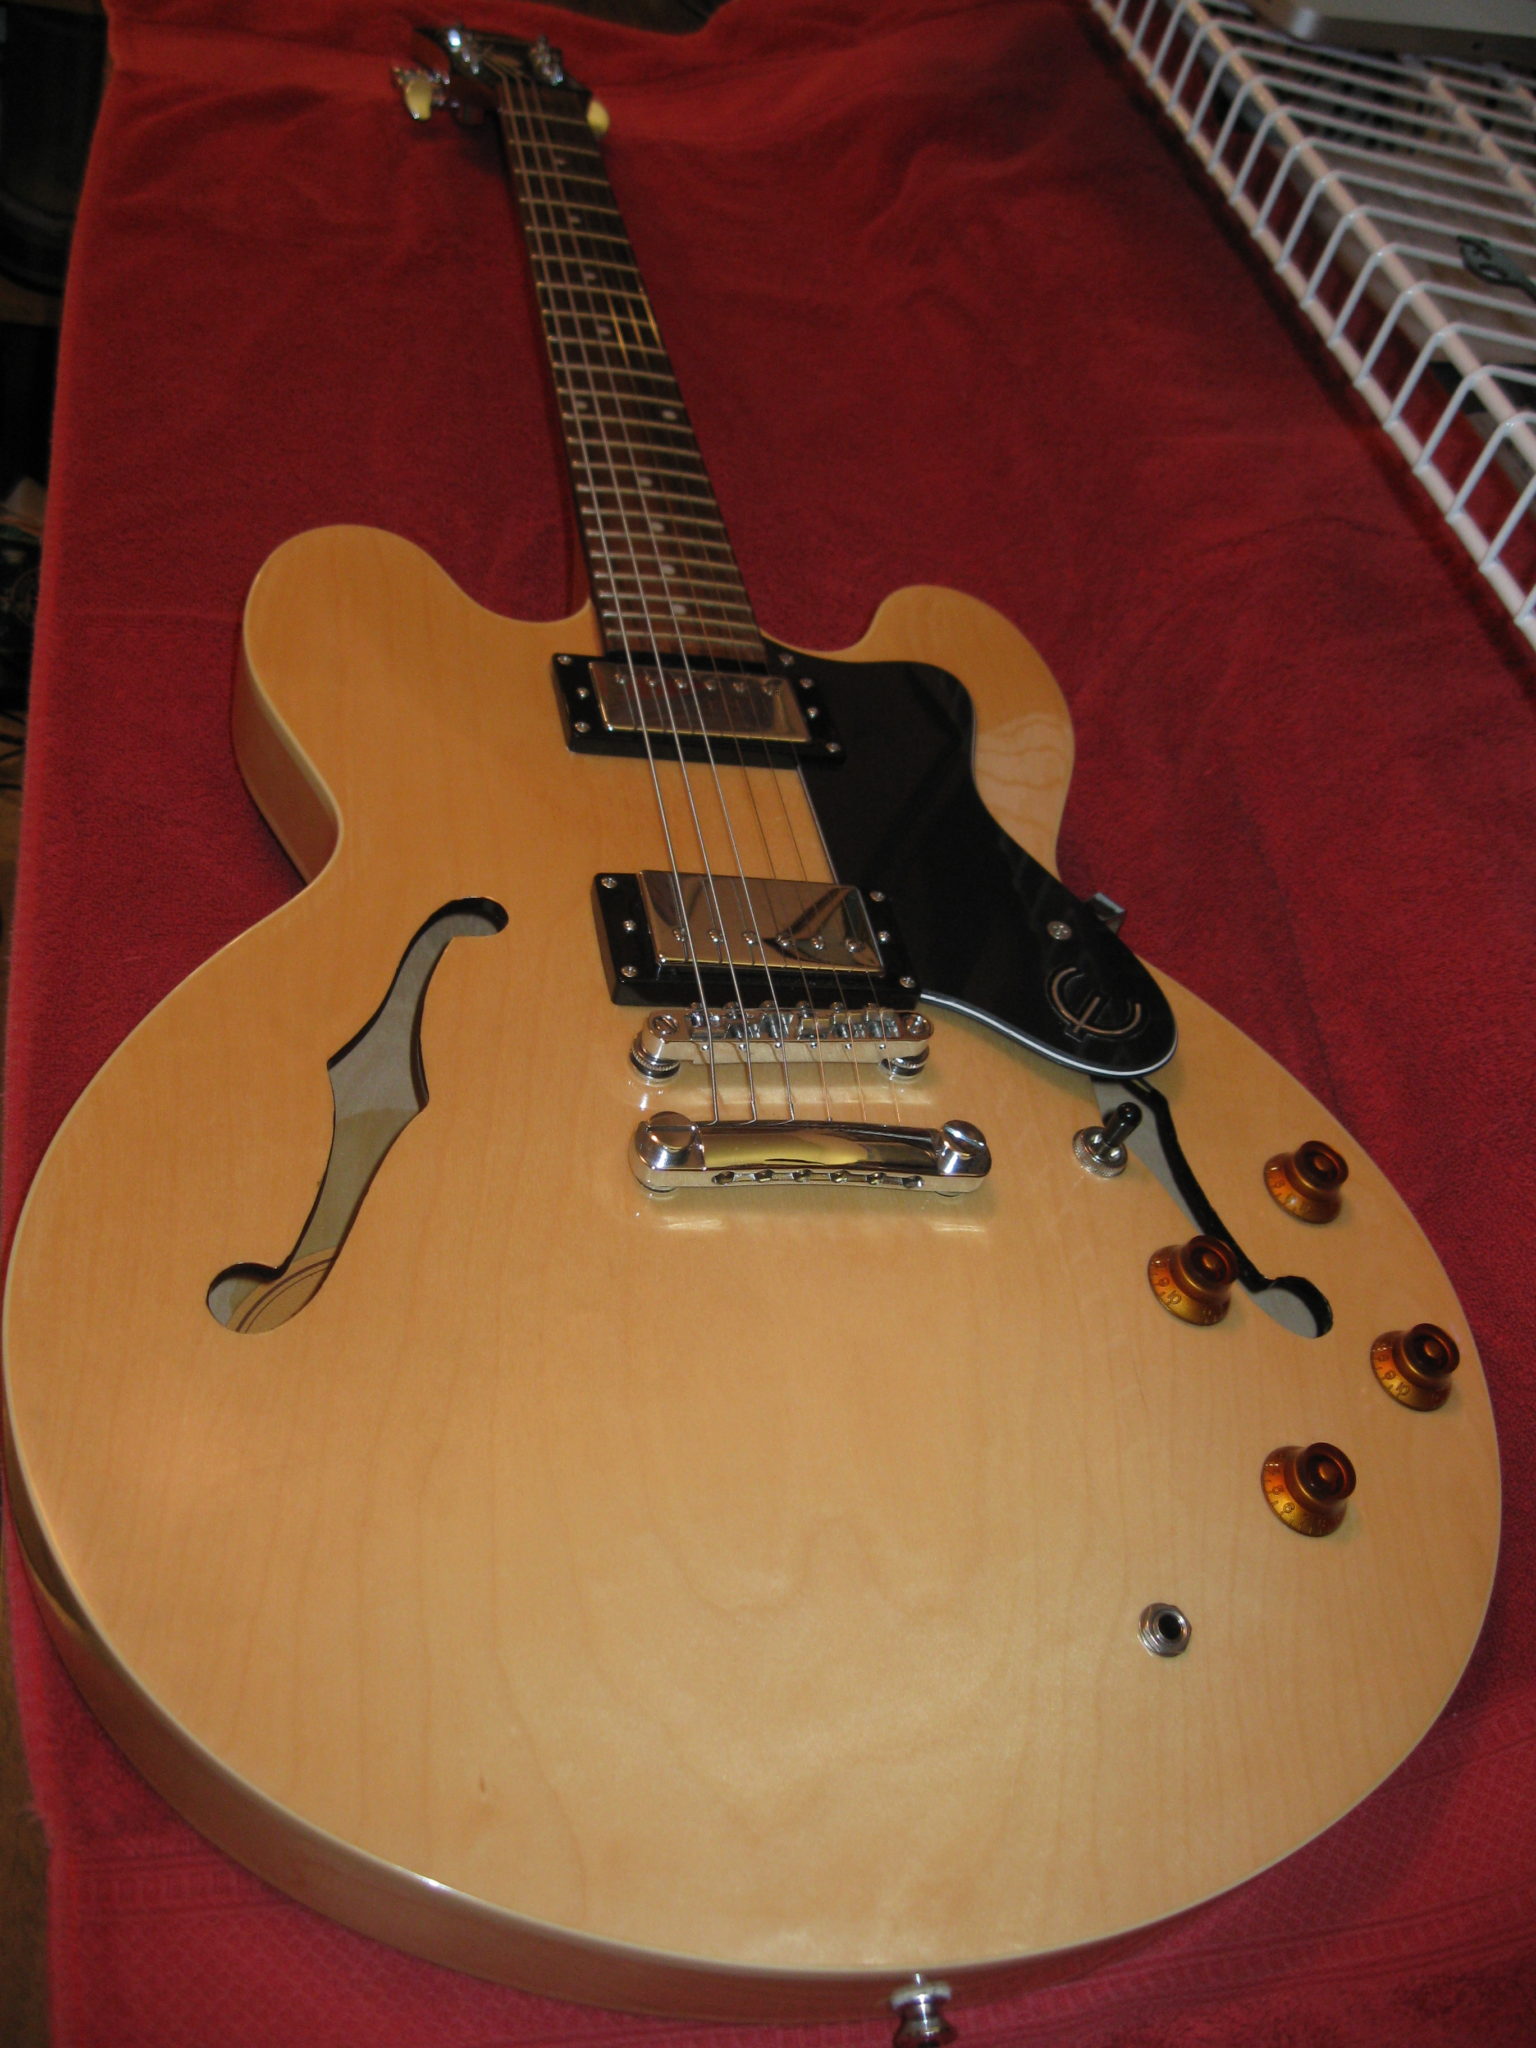
Step 1: Make sure you have a clean, cushioned place to work on your guitar. It would be a shame to scratch up your baby. By the way, make note of the original bridge height so action can be adjusted to compensate for the metal bracket.
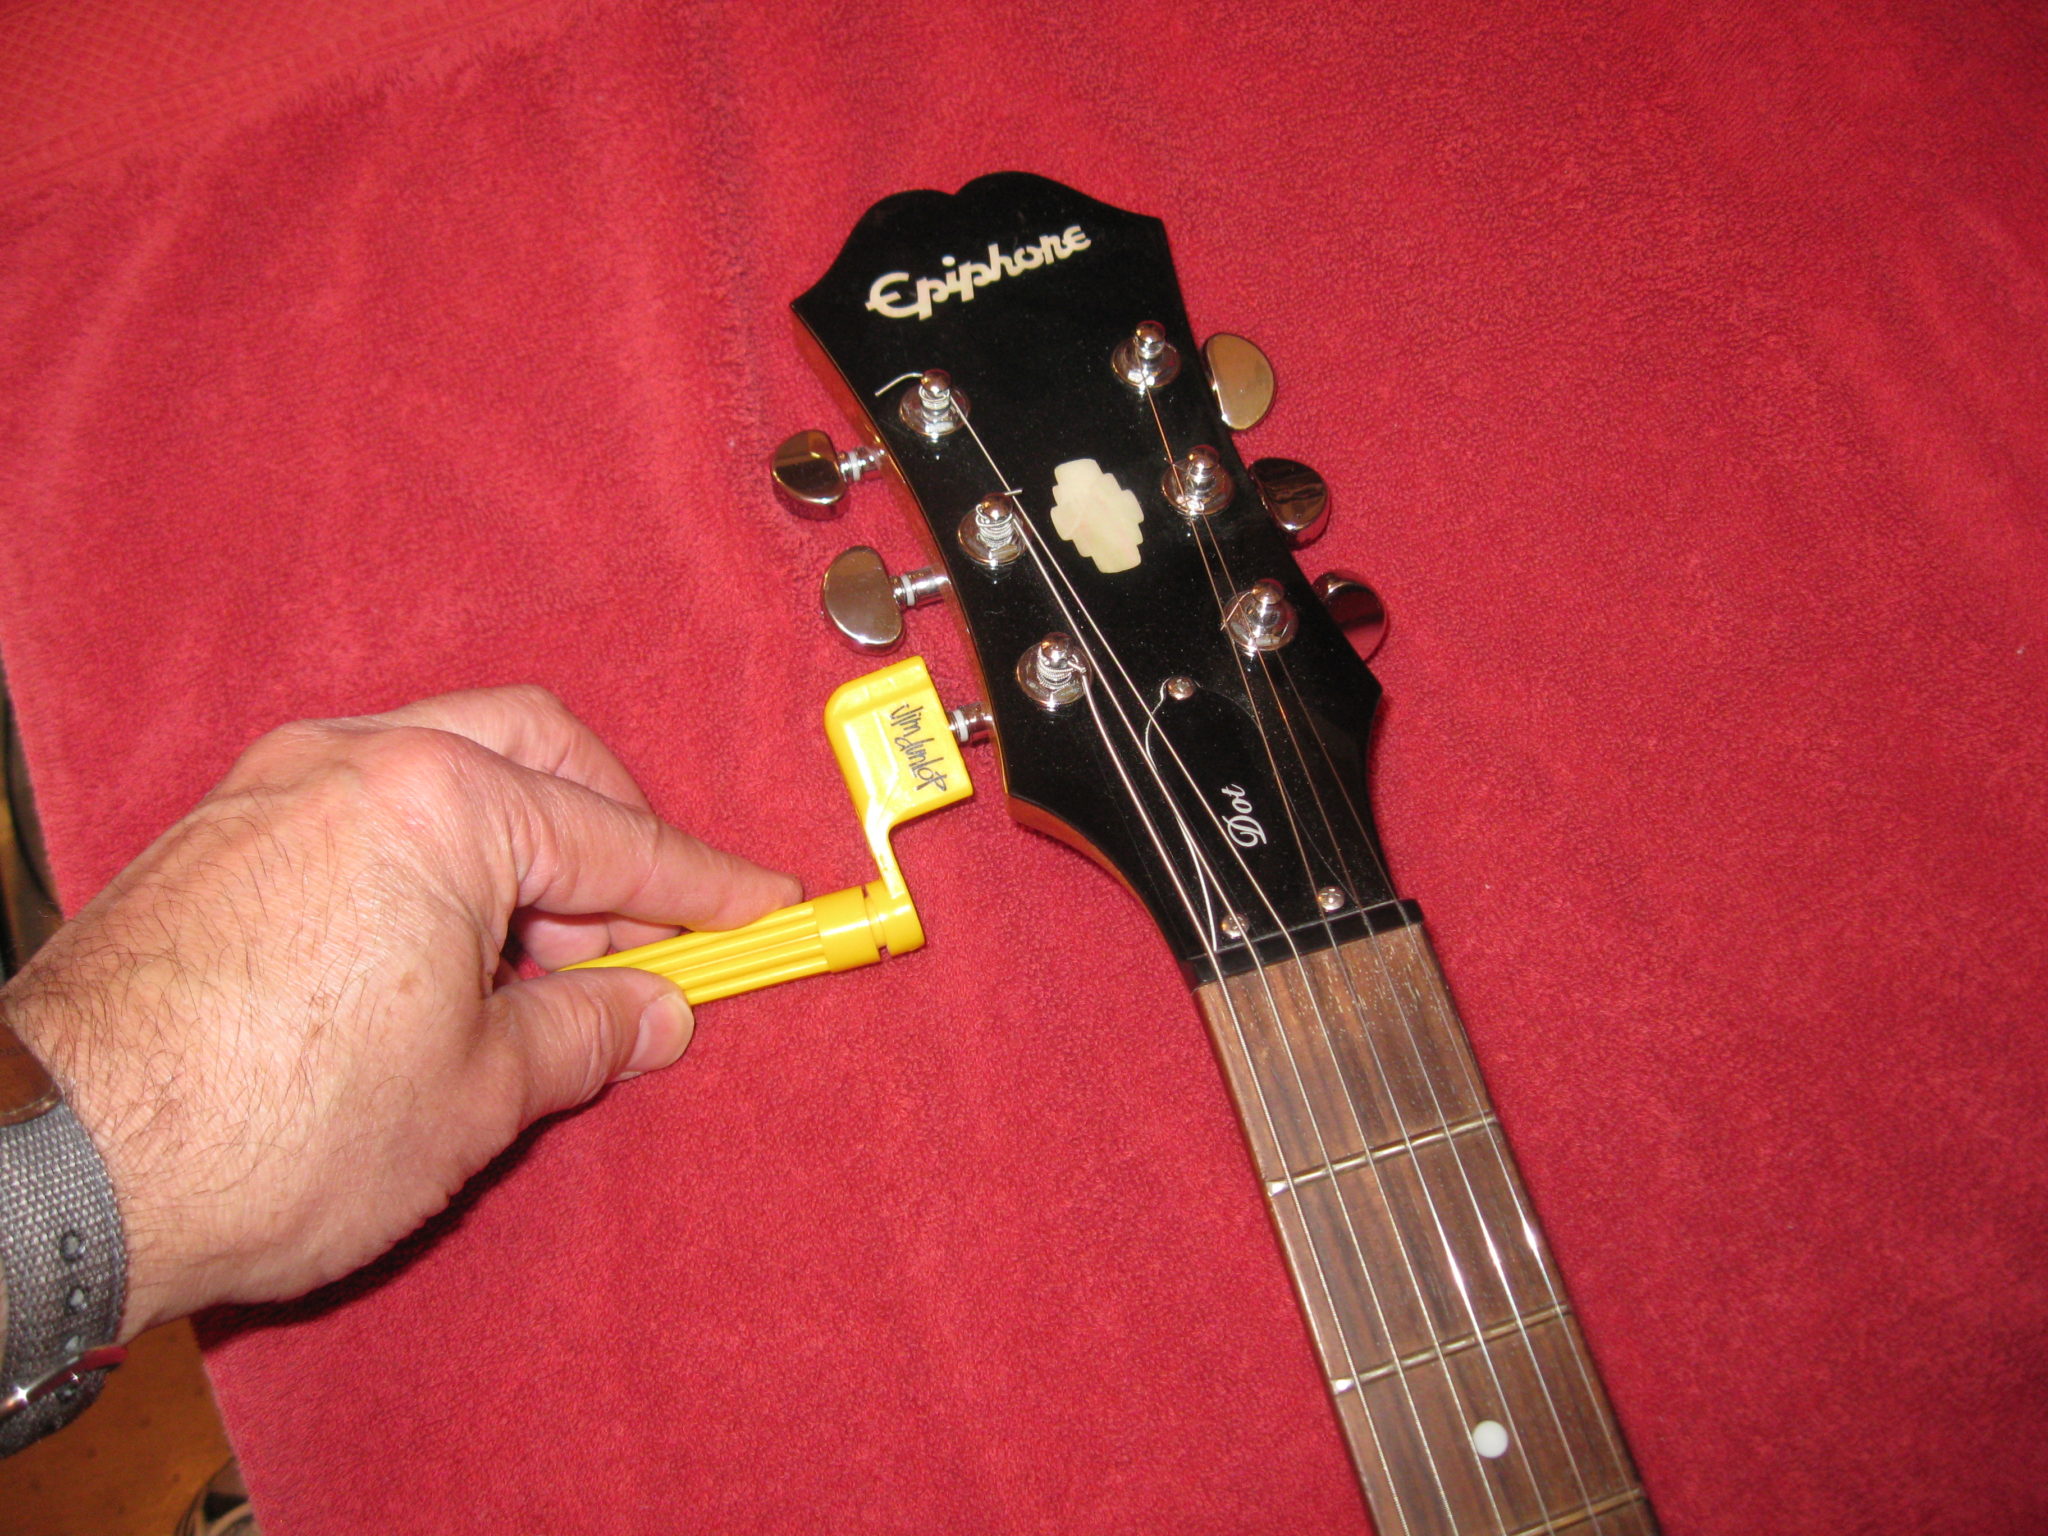
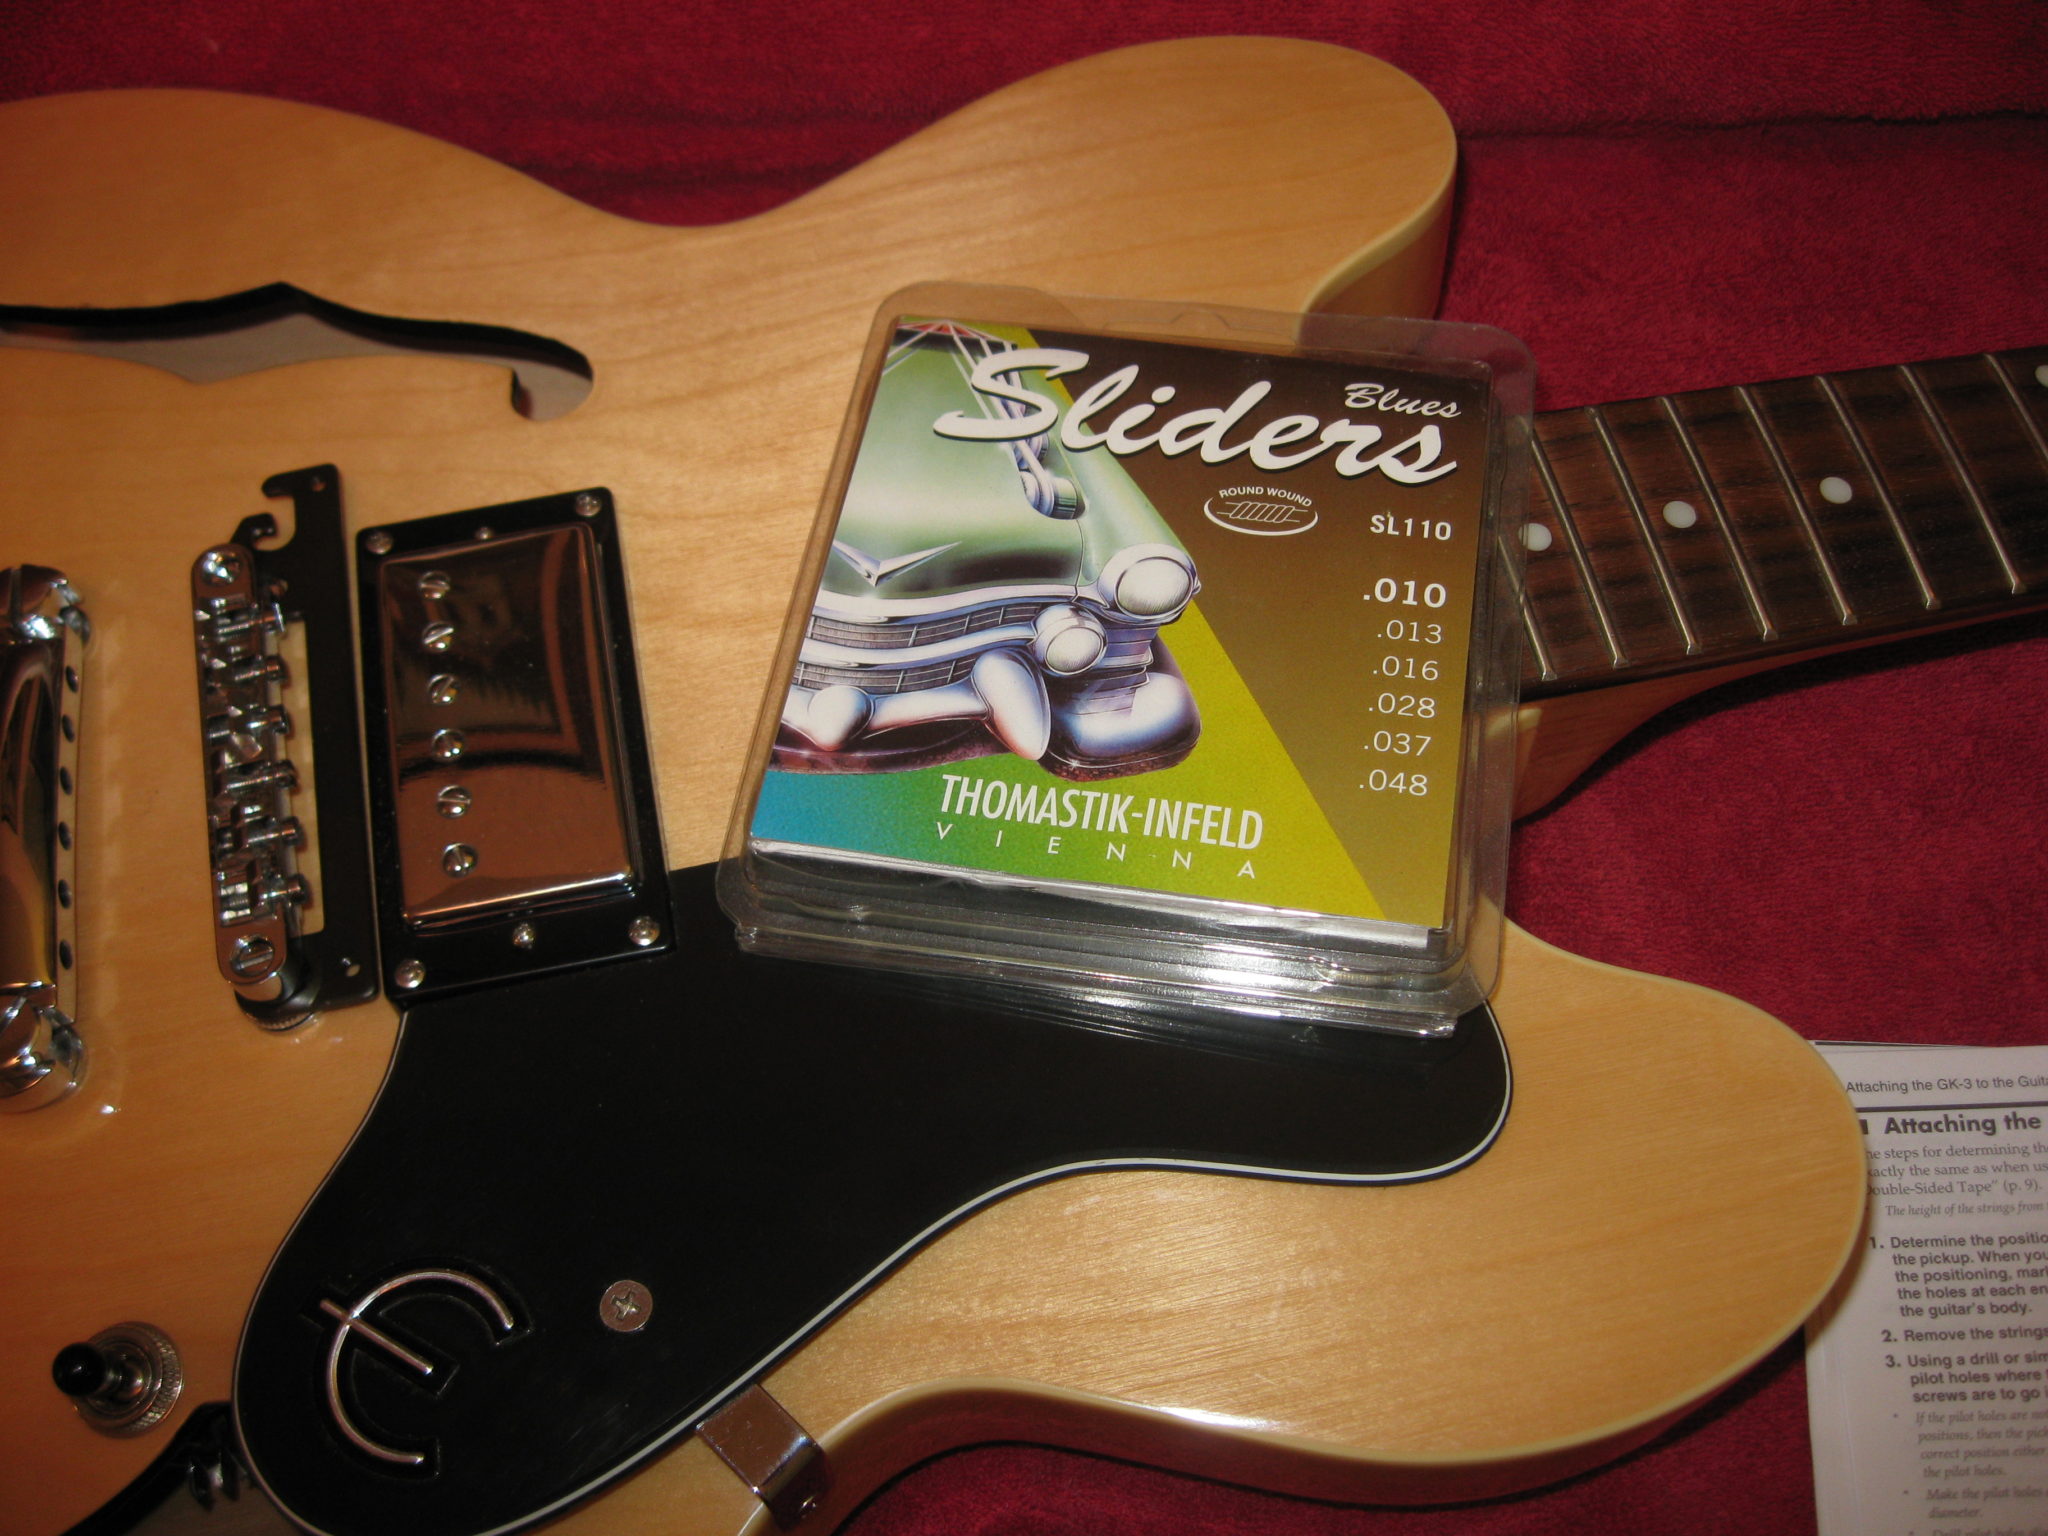
Step 2: Take the strings off.
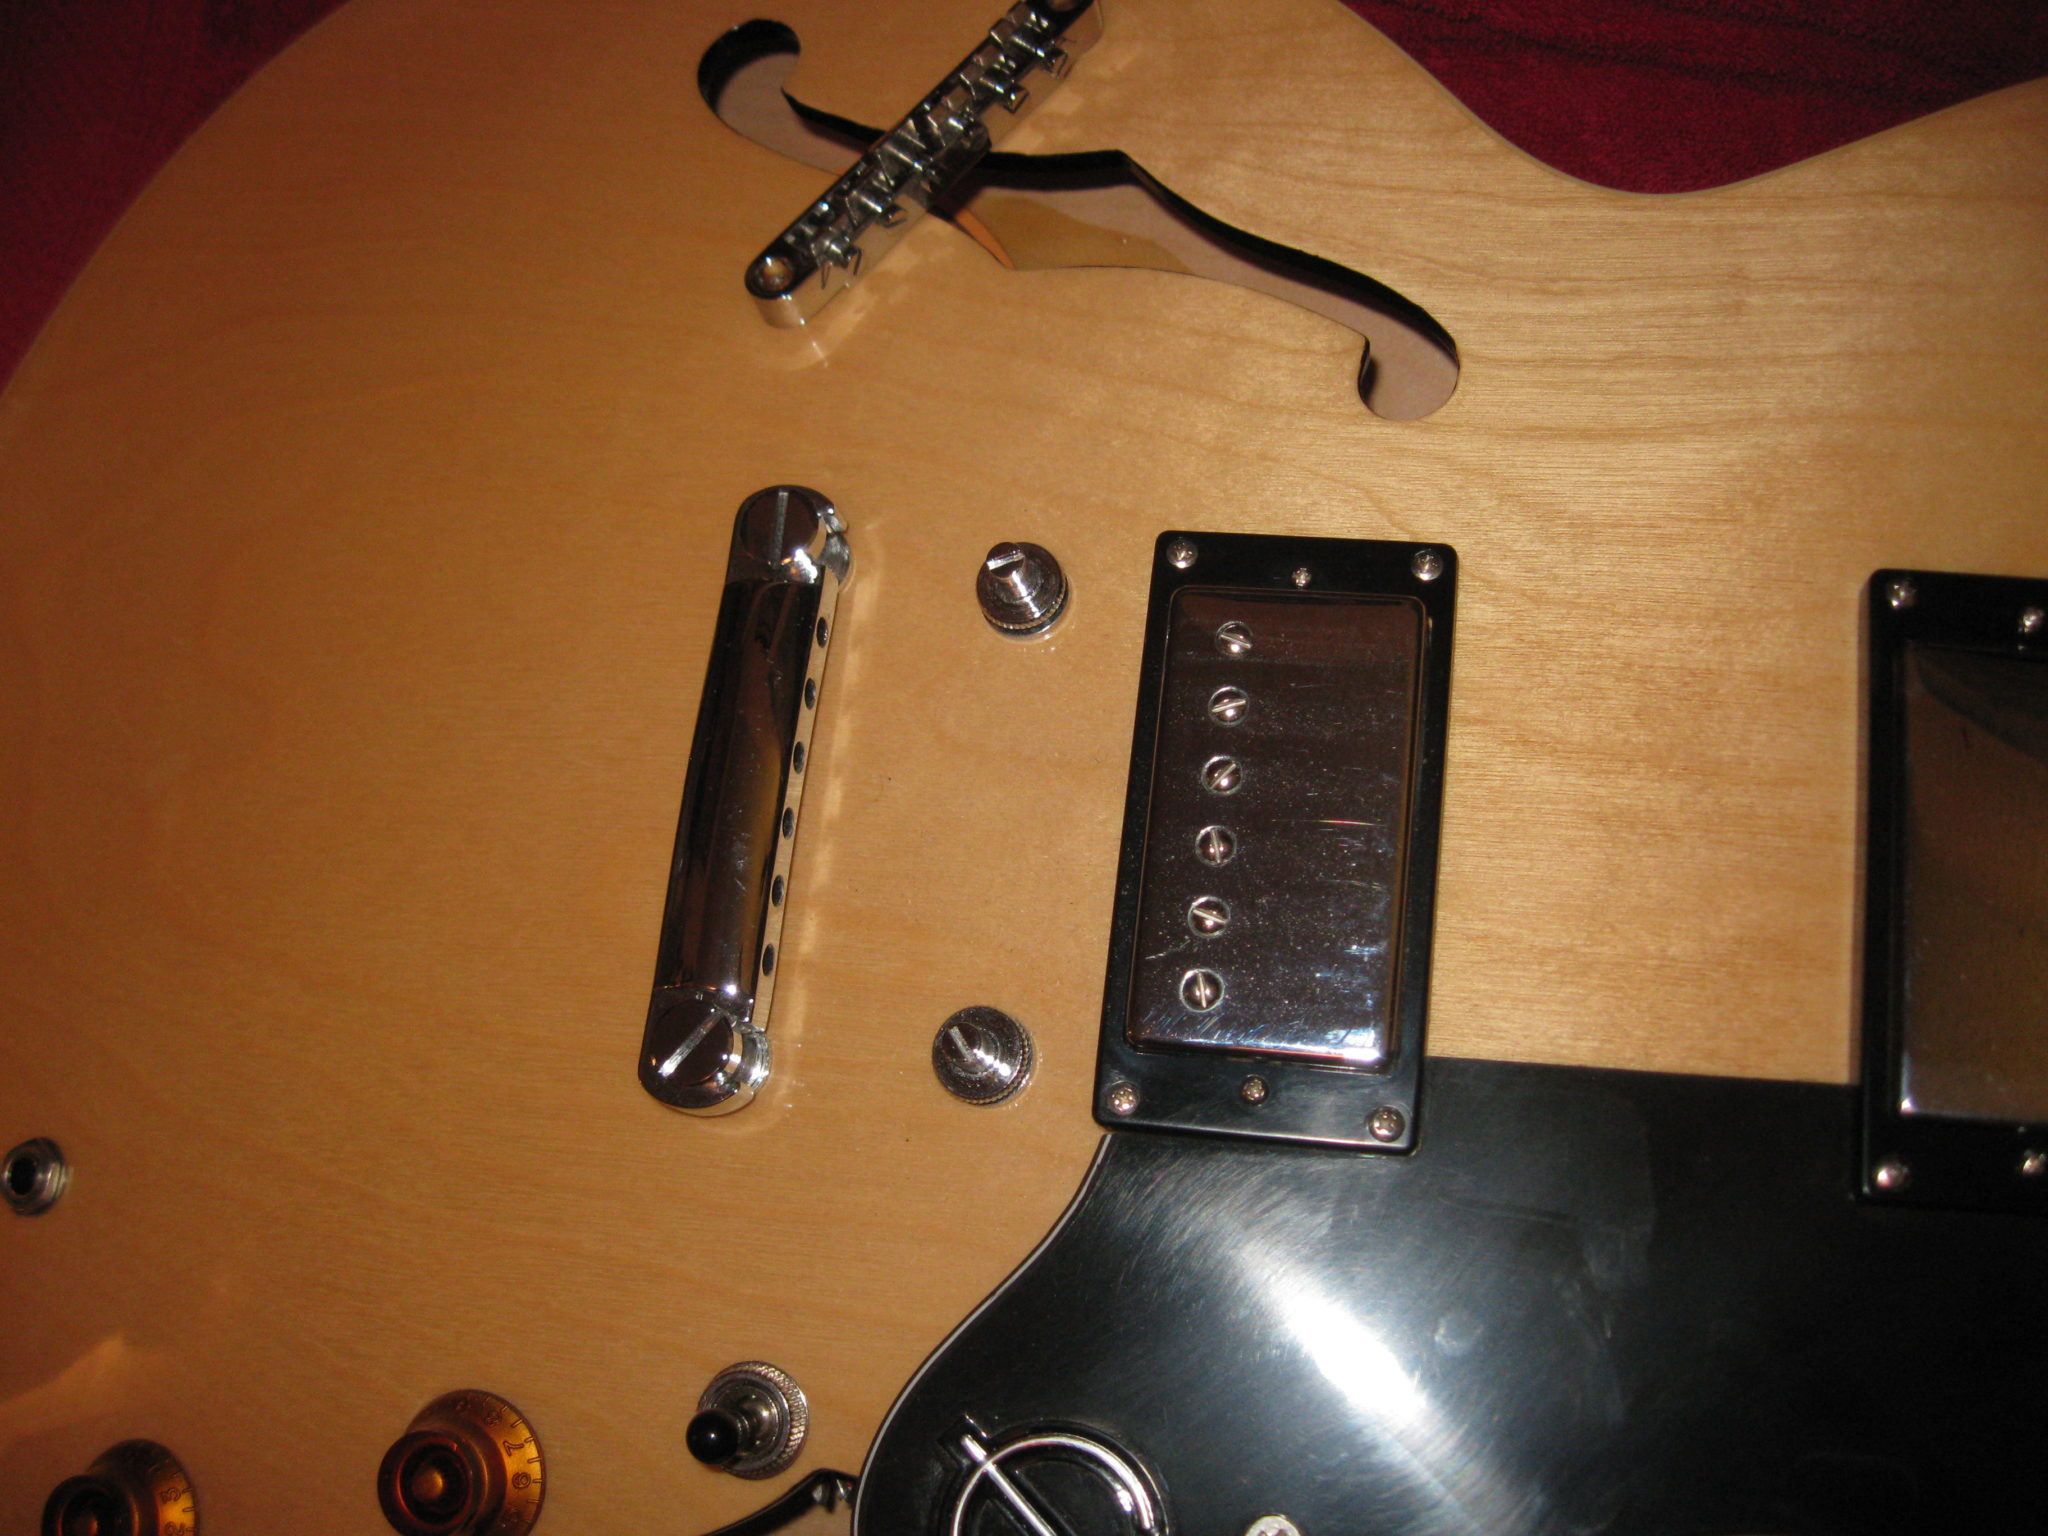
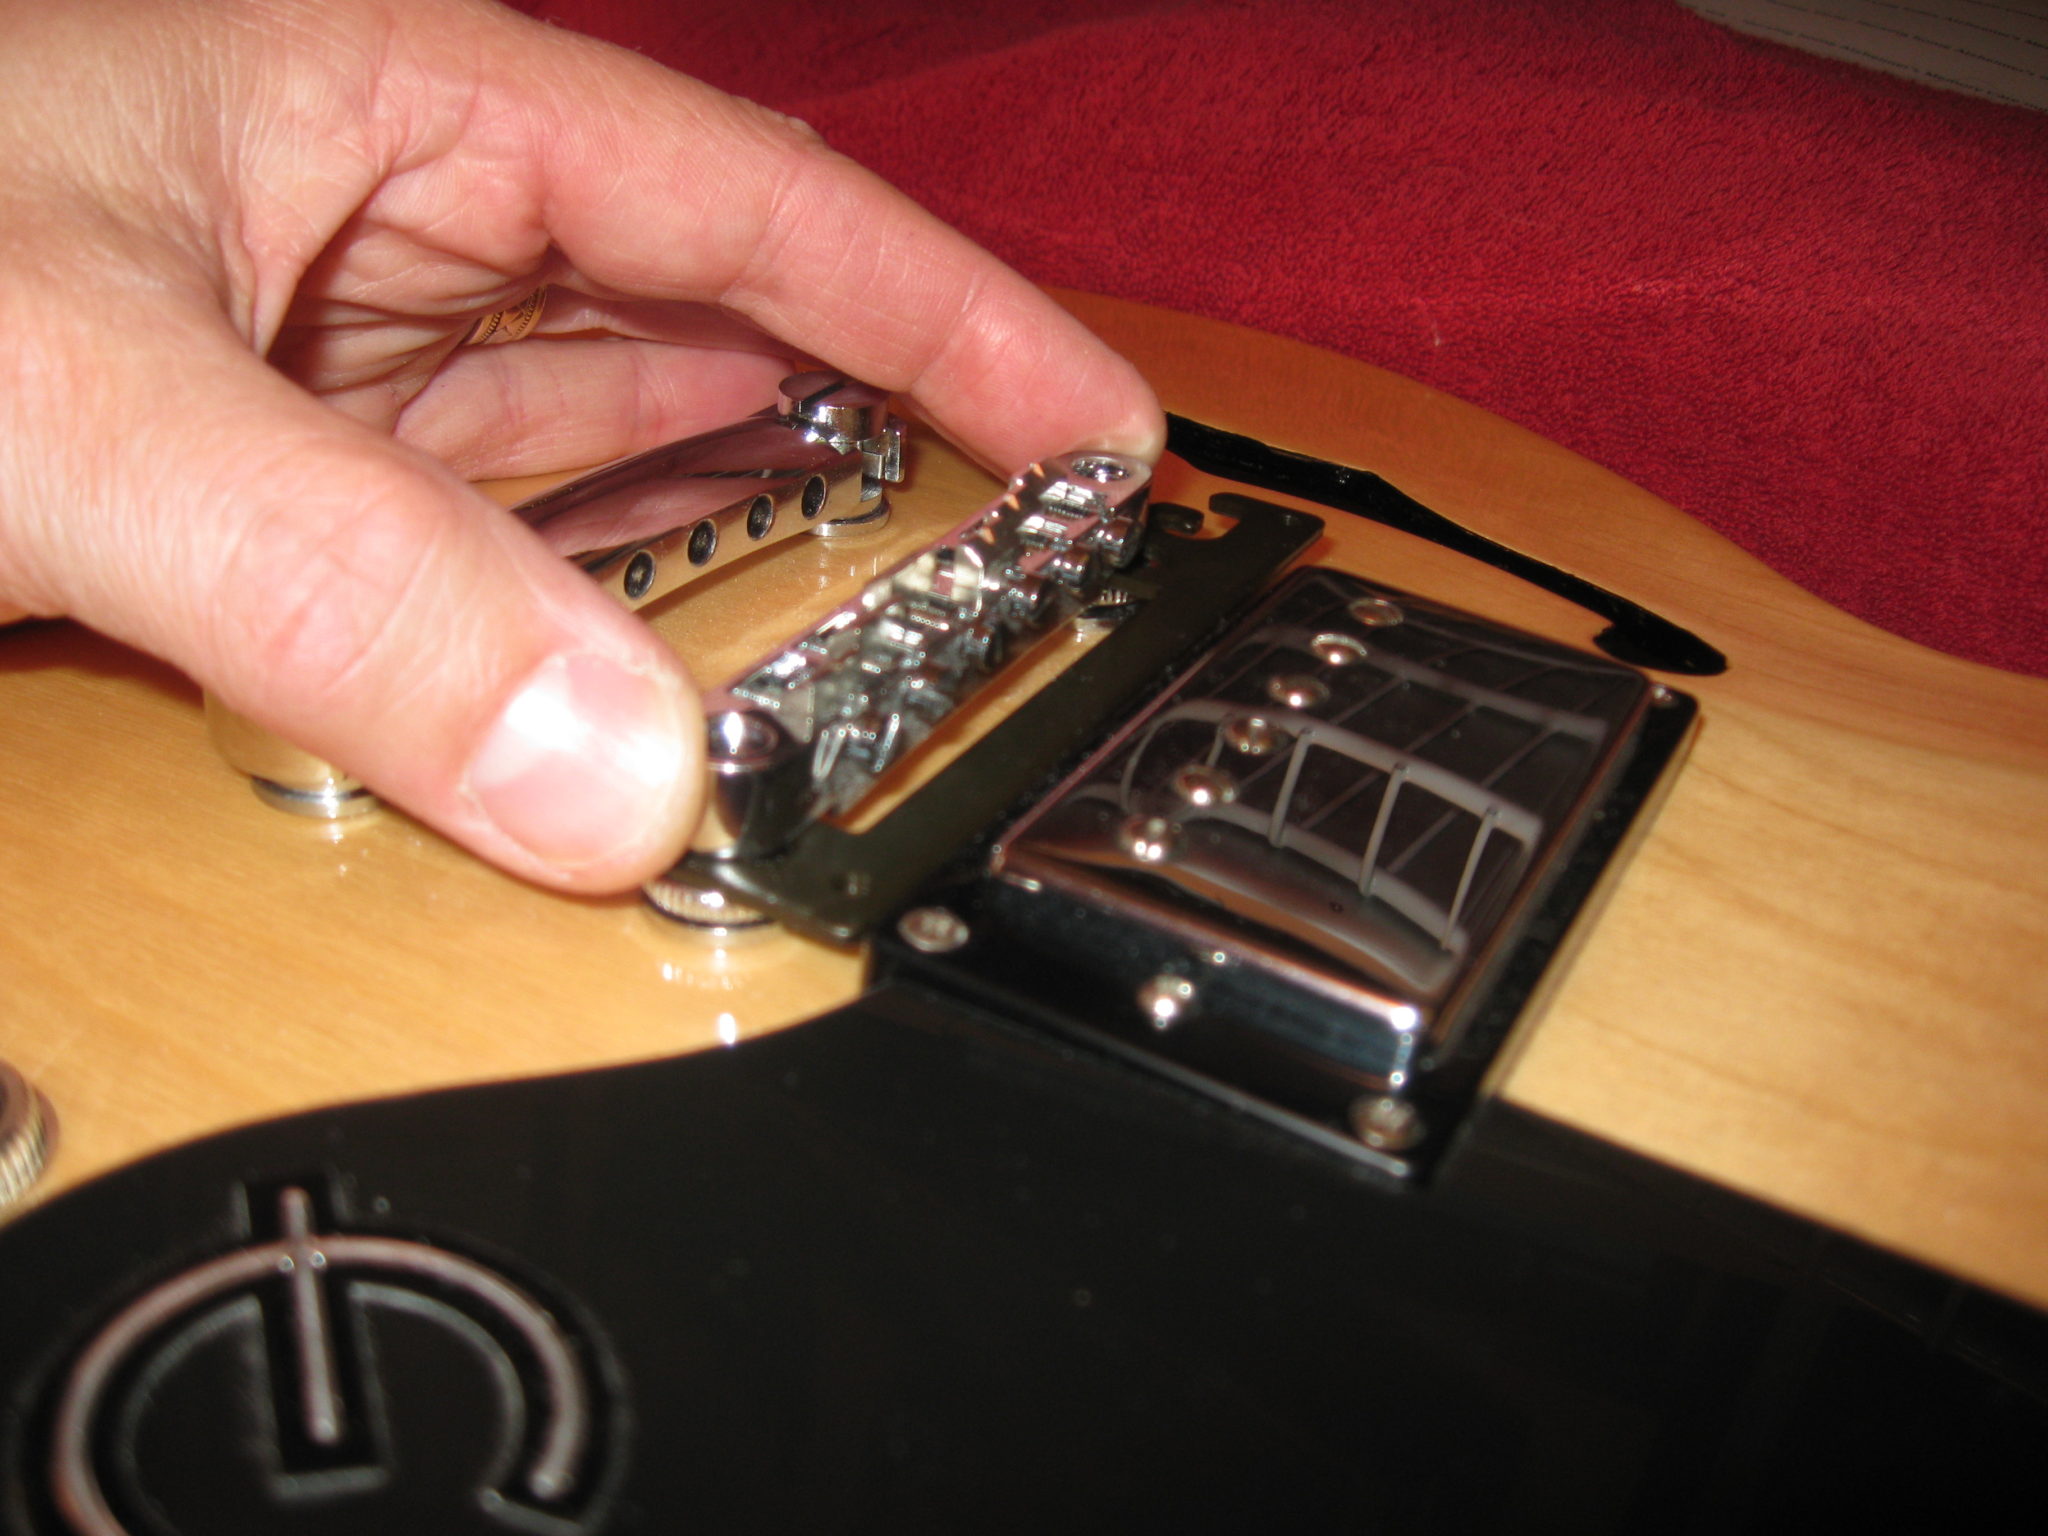
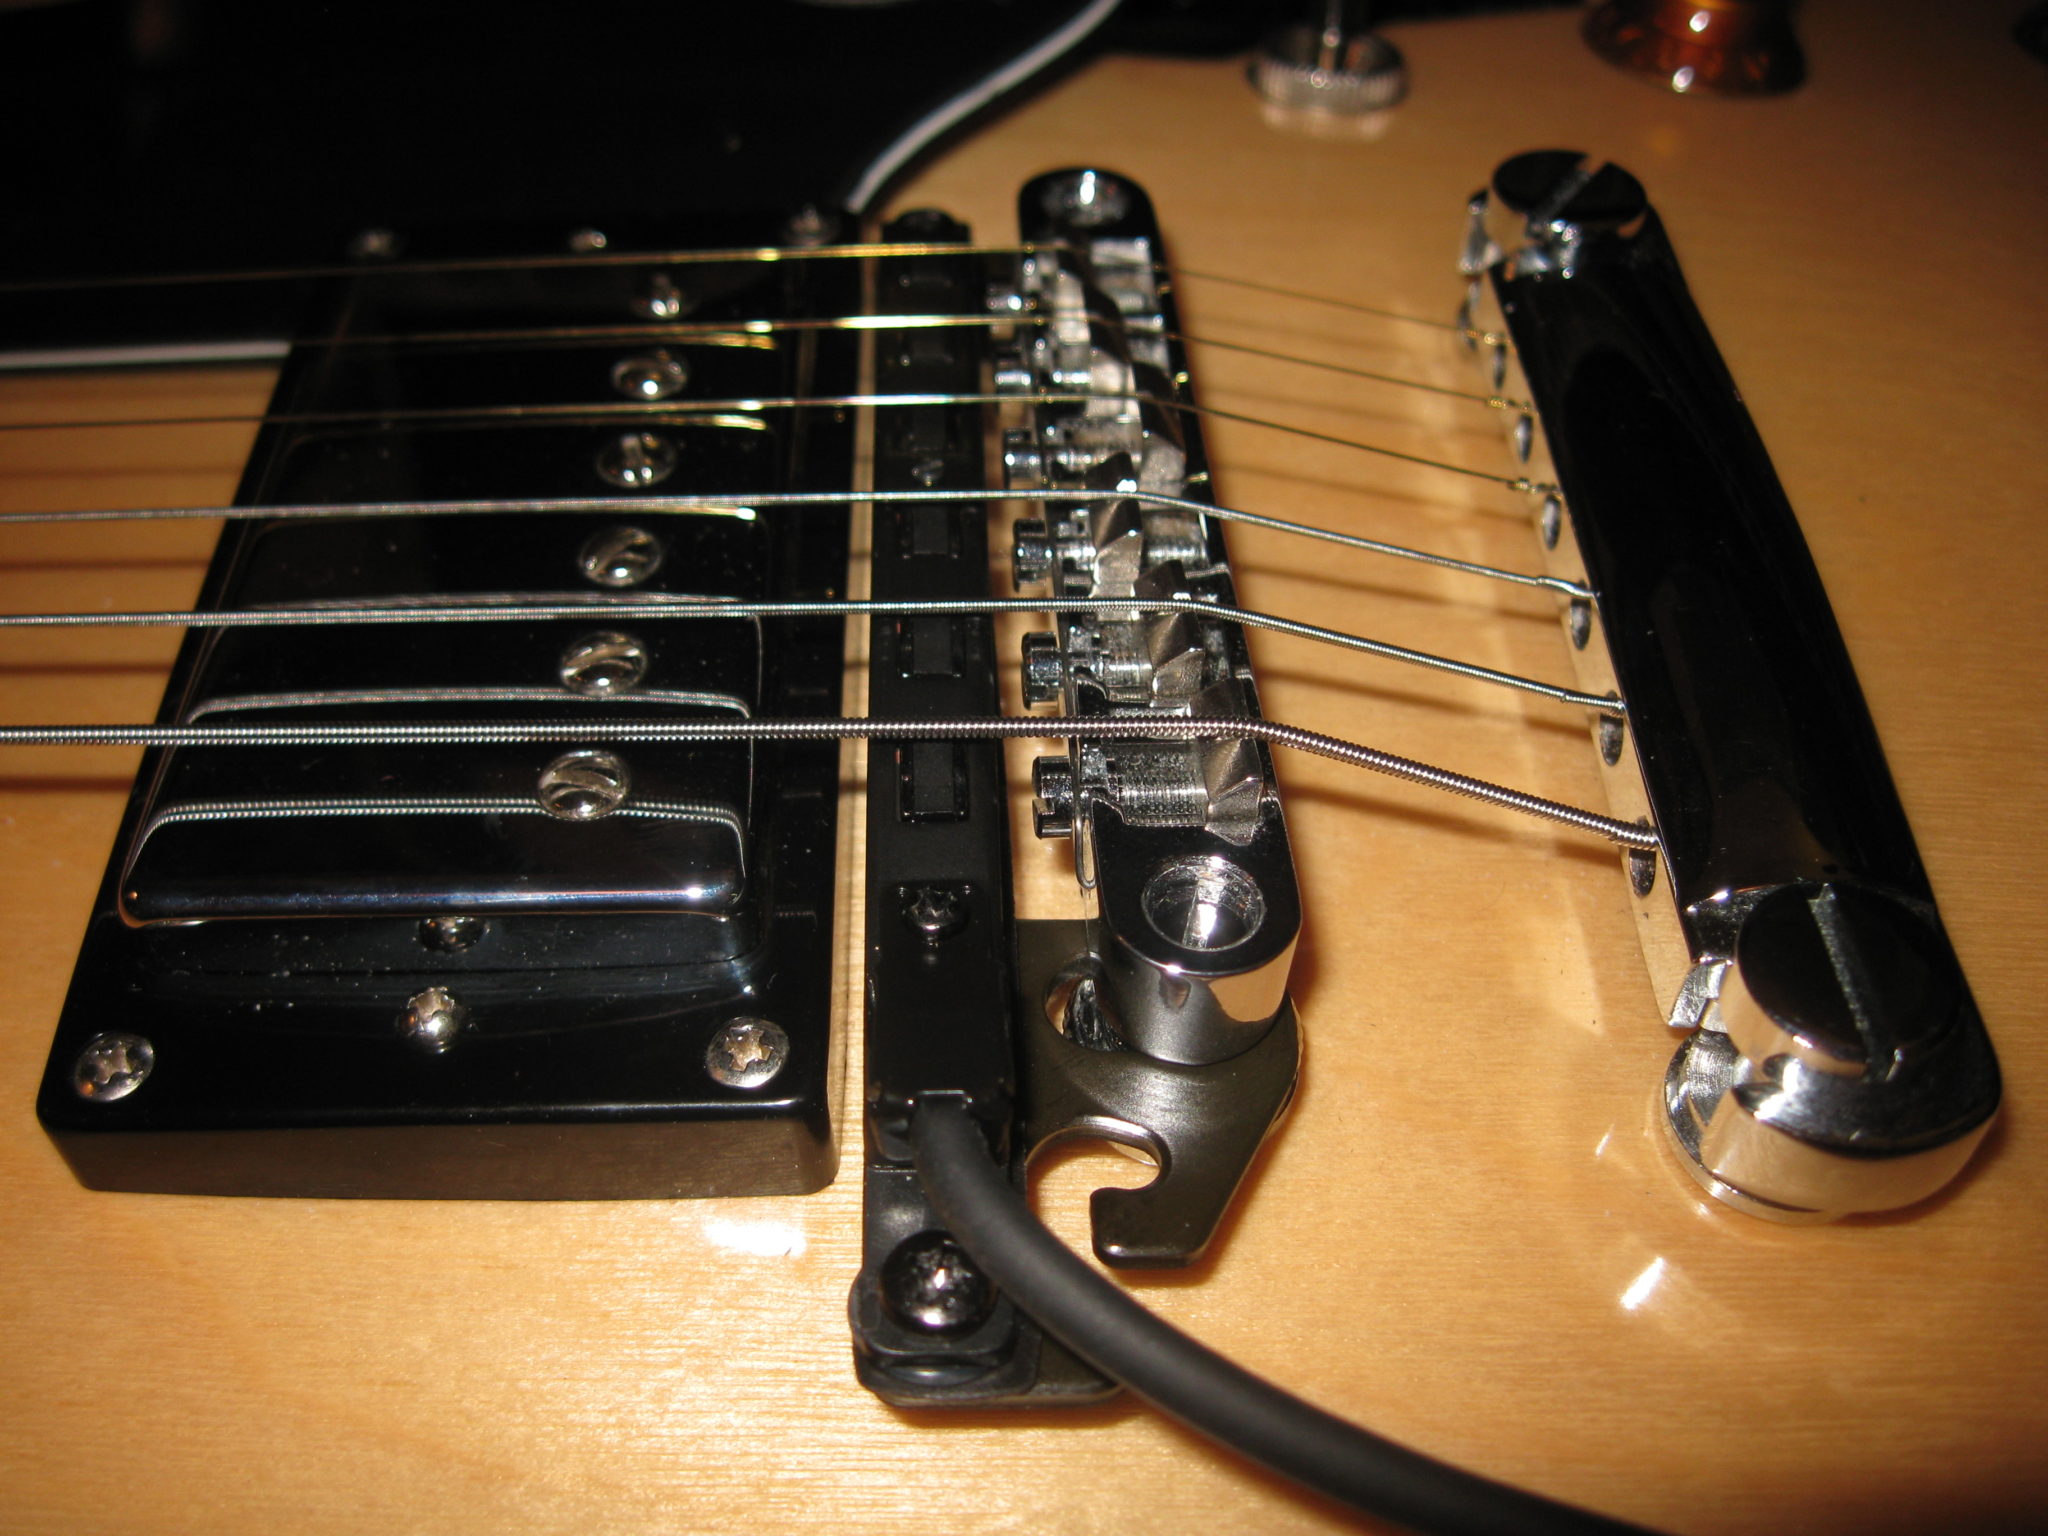
Step 3: Remove the bridge and lower the two bridge height adjustment screws of the guitar approximately 2 mm (0.08”).
Step 4: Place the holder on the posts, then cover it with the bridge.
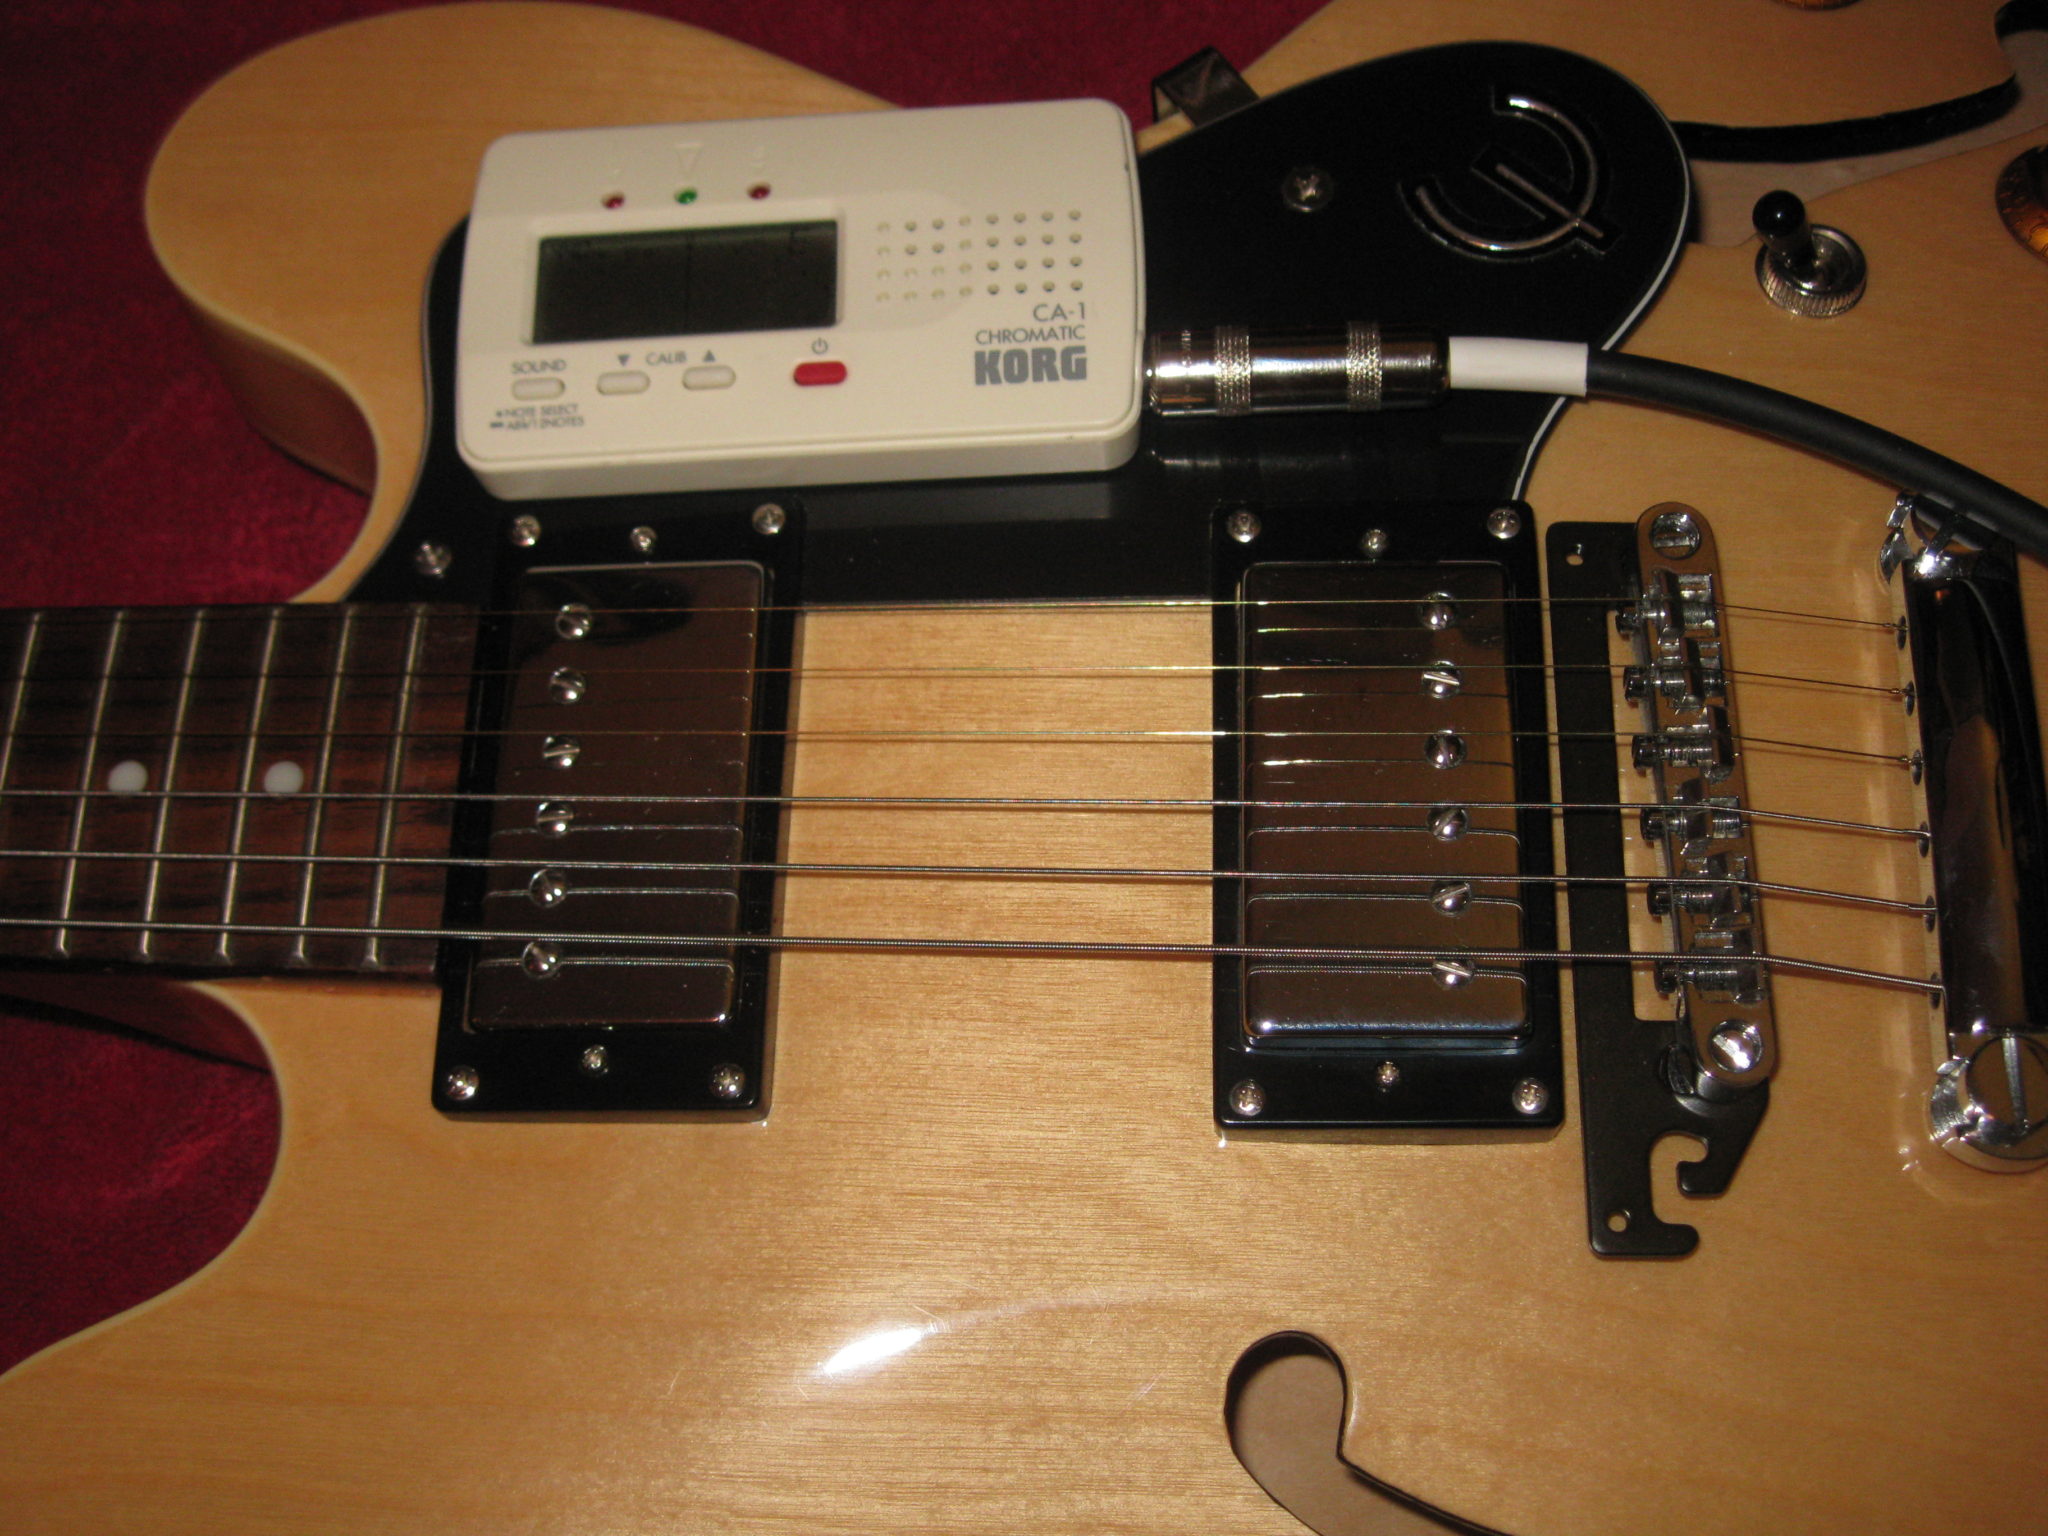
Step 5: Restring the guitar and check the string action and intonation. Note: The GK-3 manual instructs you to attach the pickup to the bracket as the first step, but I chose to wait until I had completed getting the string action and intonation set correctly to allow easier access to the adjuster screws on the bridge and to reduce the risk of accidentally damaging the GK-3.
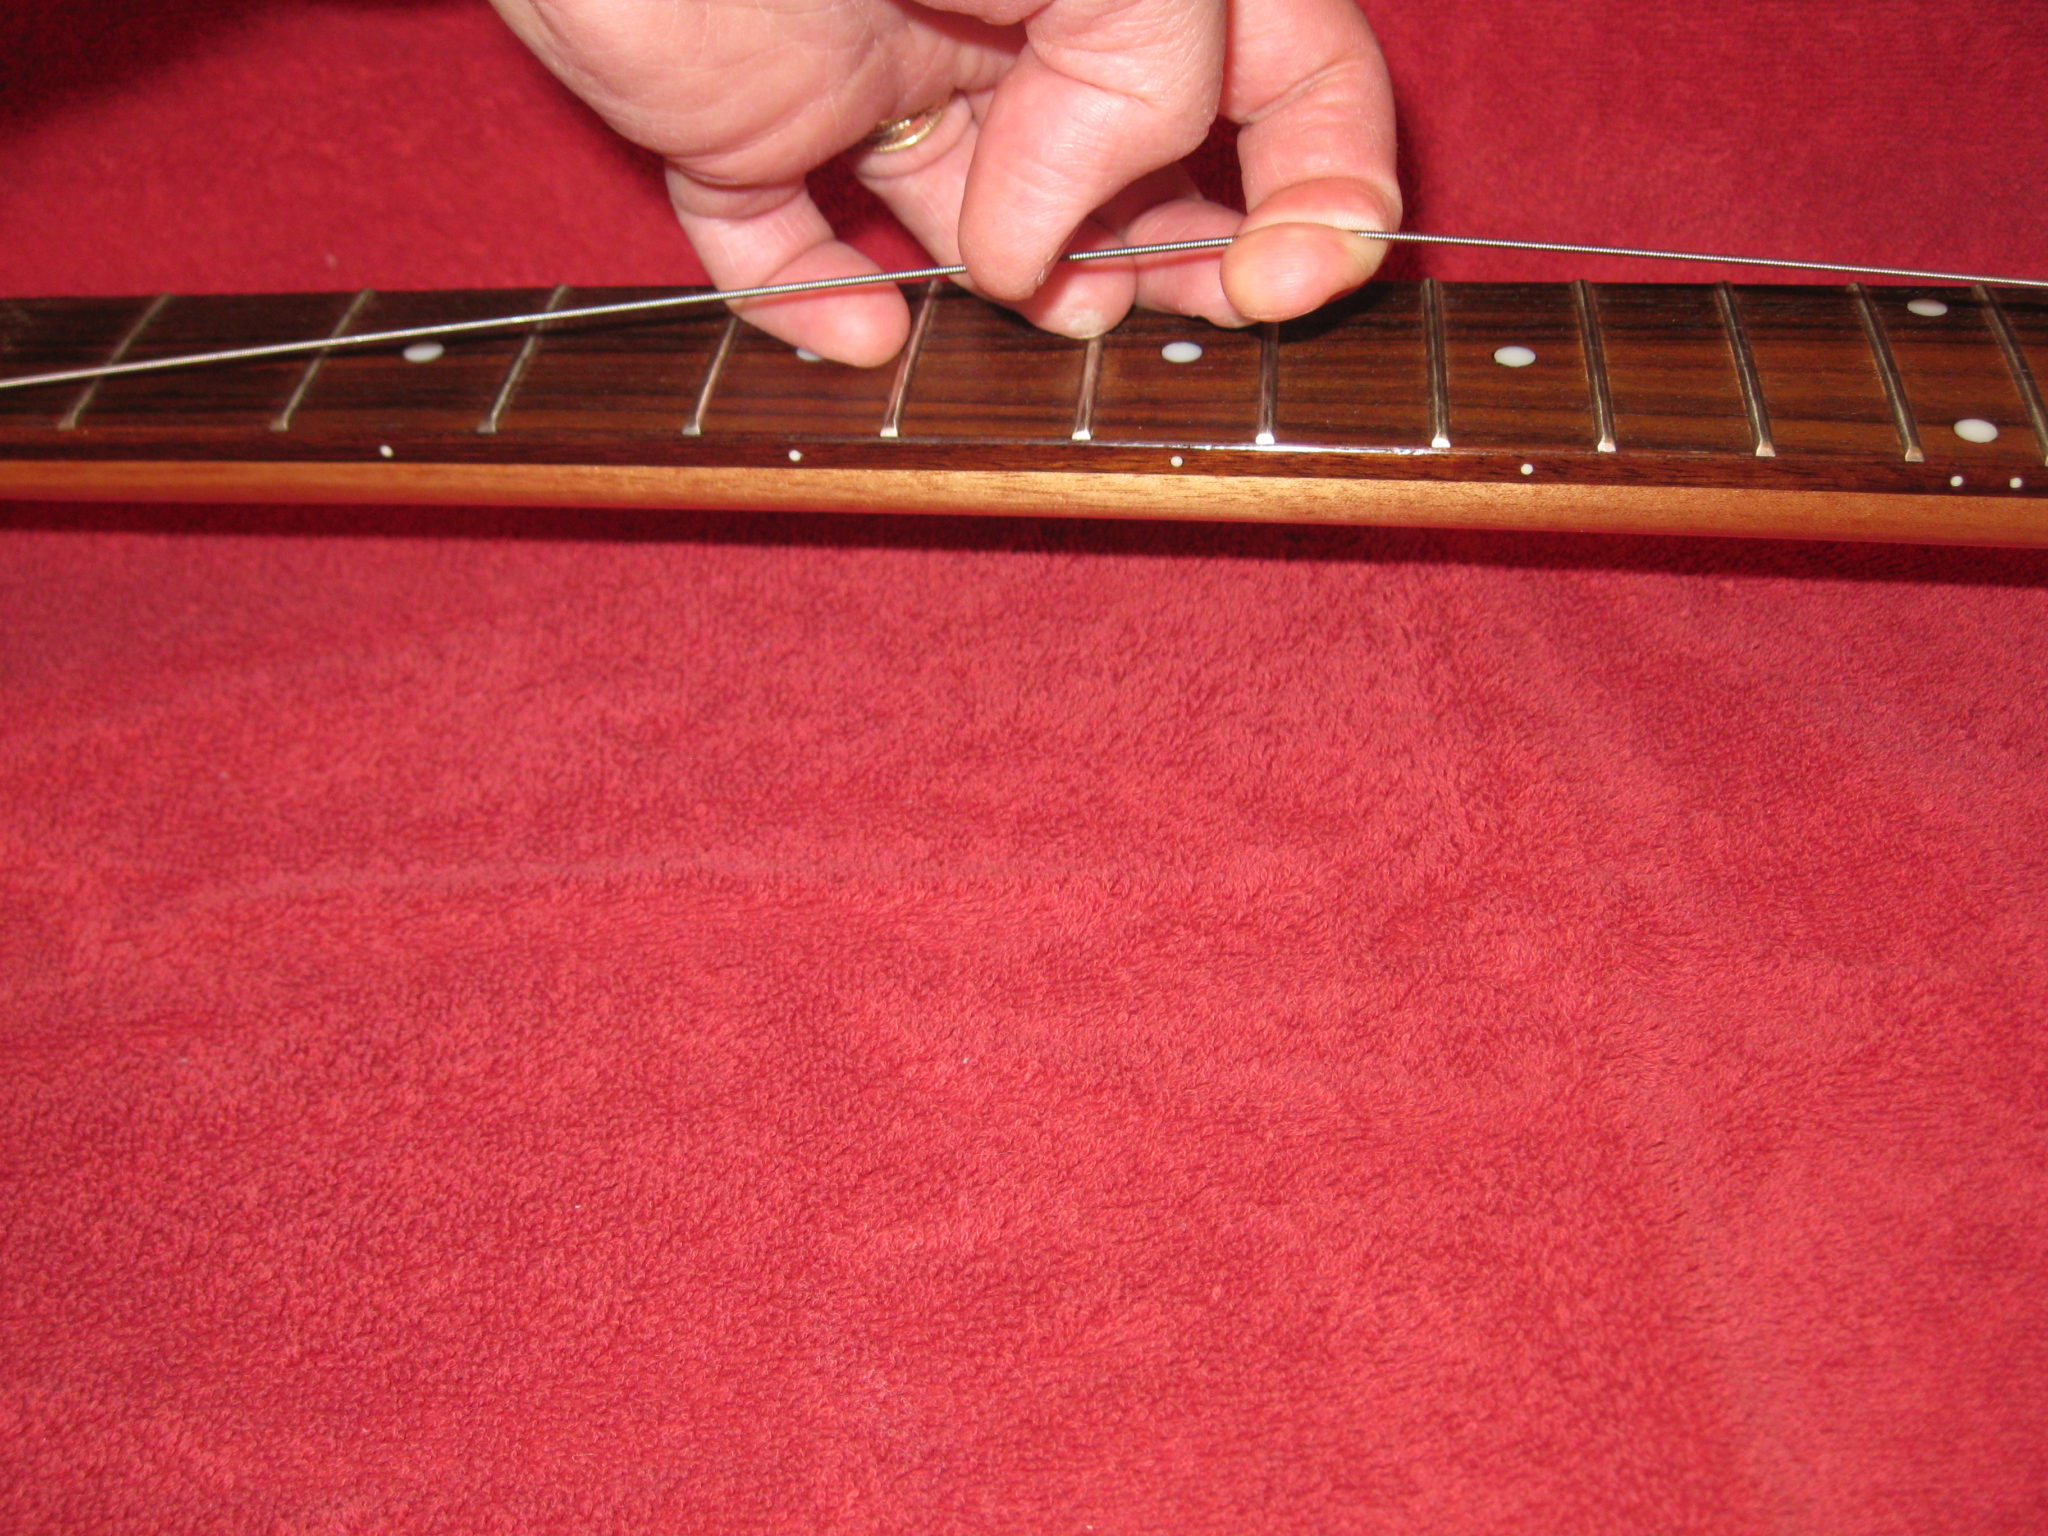
Be sure to wrap the string under itself and bend it against itself to prevent slippage.
After tightening each string *gently* tug upward about an inch for a few seconds. This will help minimize string detuning after installation.
Step 6: Tune the guitar.
Step 7: Install the GK-3 pickup onto the bracket
Loosen all of the strings so that you can pull the bridge off of the posts.
Remove the controller bracket.
Install the GK-3 pickup onto the bracket with the appropriate rubber sheets and/or rubber tubes according to the guidelines in the manual to achieve the specified 1.0 mm gap between each string and the six individual GK-3 pickups. This is CRITICAL. You may need to install the pickup/bracket and bridge and tighten/tune the strings several times to achieve the proper spacing.
The following notes appear in the owner’s manual regarding how to use the little rubber shims and tubes to get the pickup height just right. This is crucial.
The pickup height should be adjusted so that the distance between the pickup and the strings is about 1.0 mm (0.04″) when the highest frets on the first and sixth strings are fingered. Check the height using the supplied clearance gauge (1.0 mm).
If the pickup ends up being too low, use two rubber sheets layered together.
But if the pickup still sits too low even after layering the two rubber sheets, then use the rubber tubes.
Here is a picture of the bracket with the pickup screwed to it now, with little rubber tubes to allow height adjustability. (It took me several runs of trial and error to get the height adjusted correctly, so be patient!)
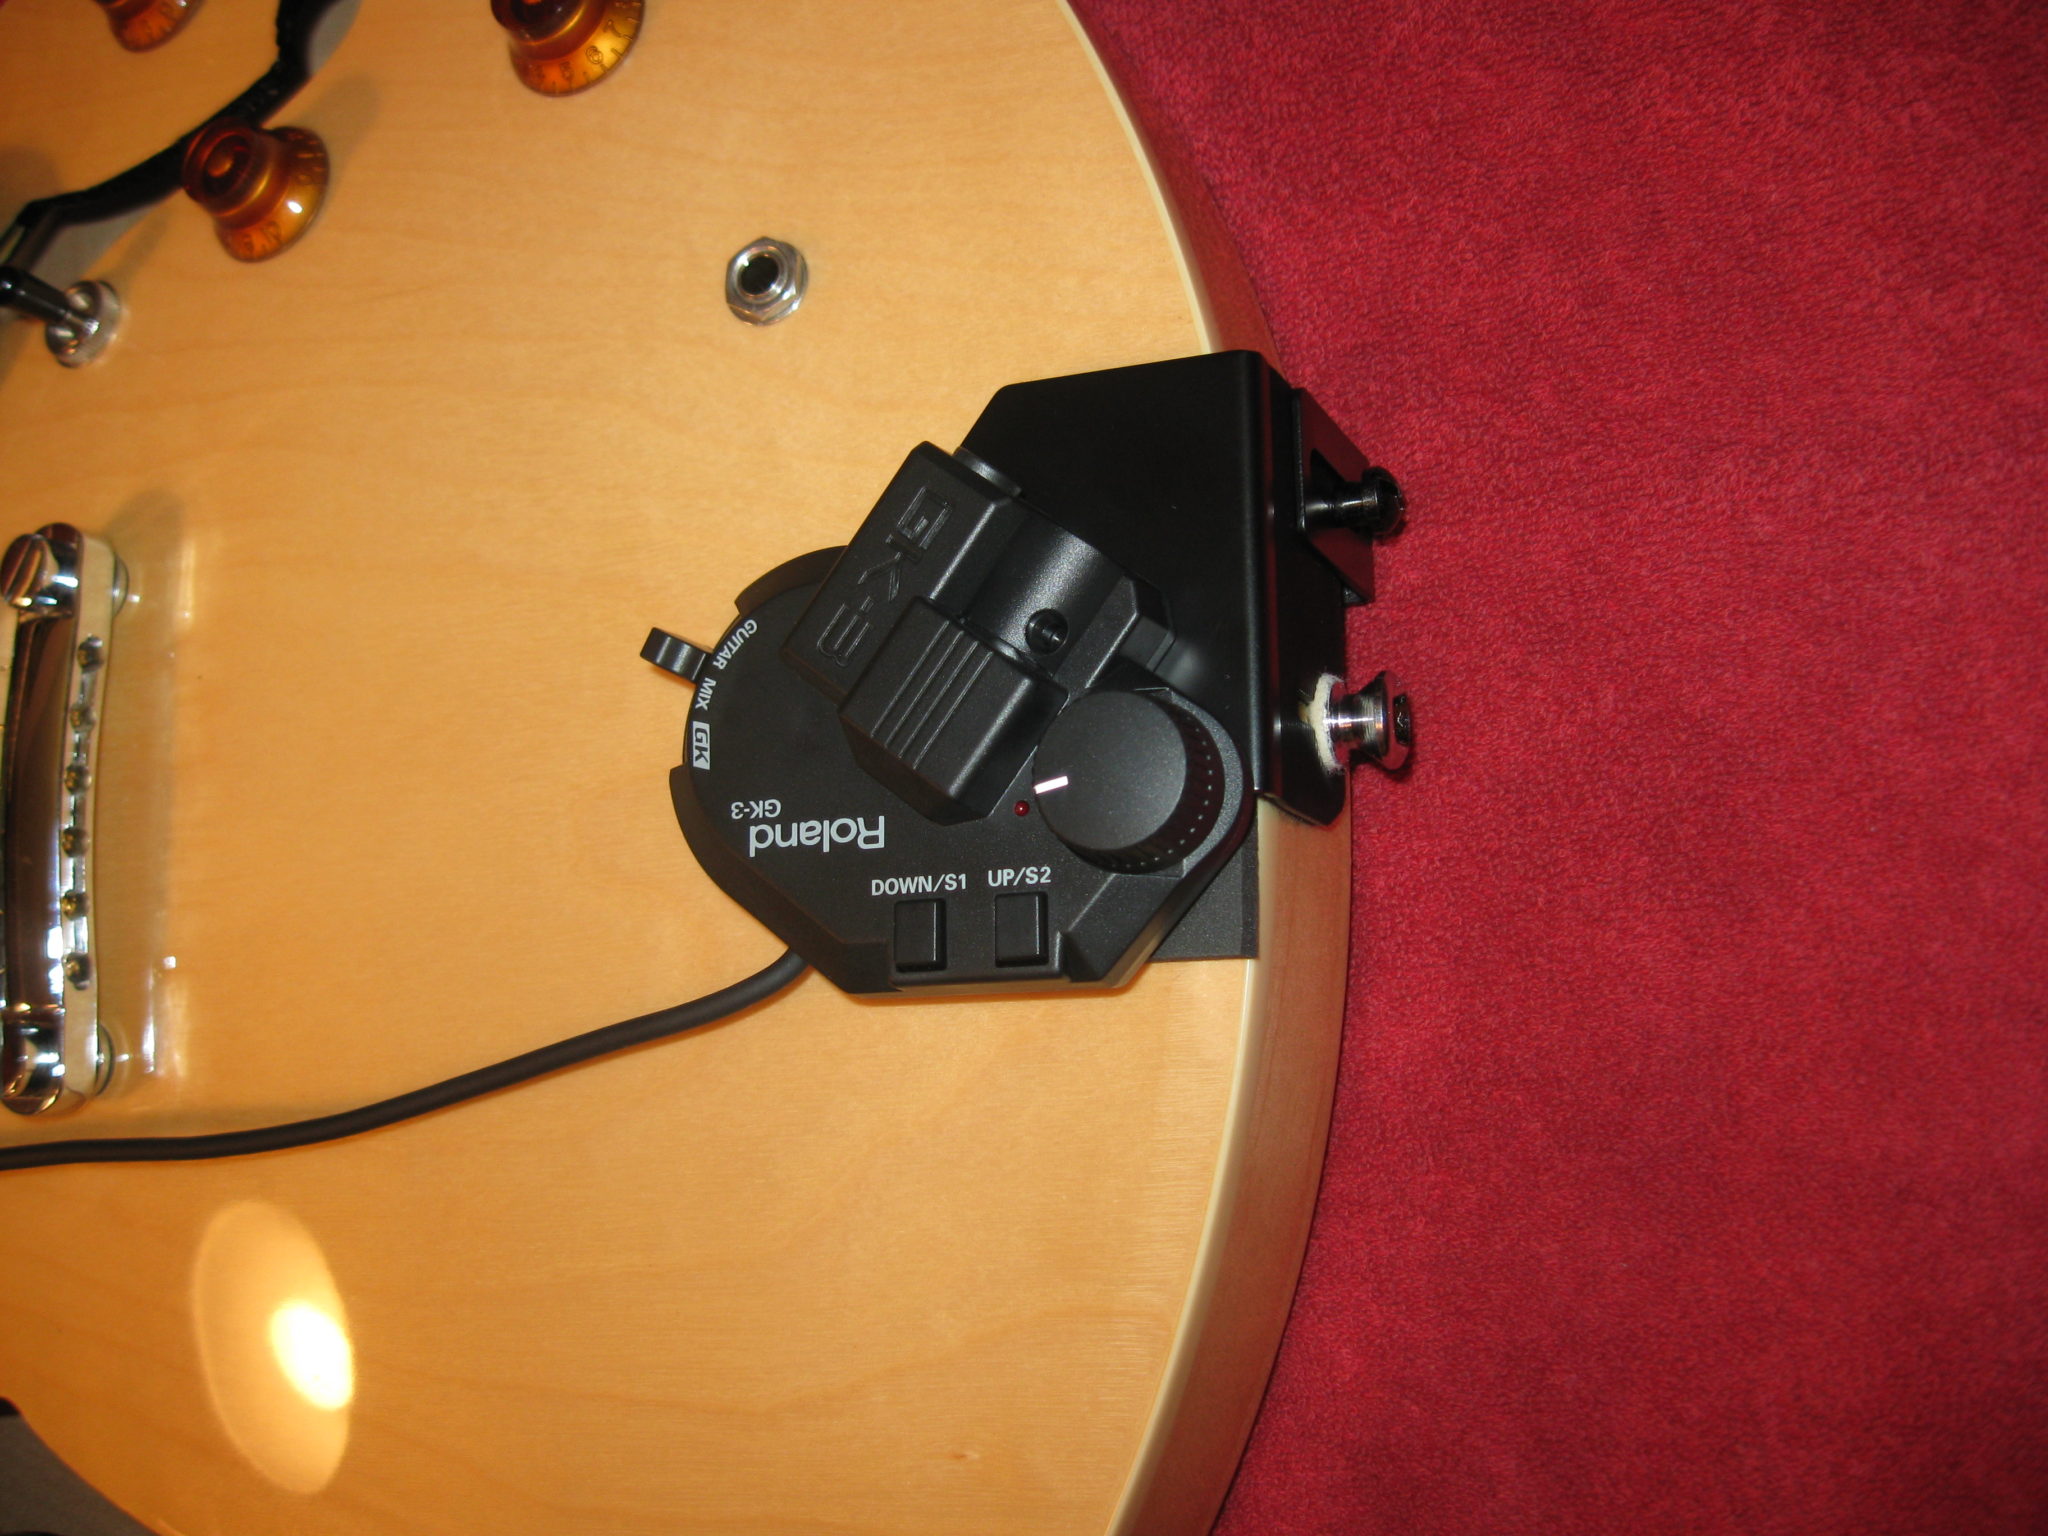
Step 8: Attach the Controller Unit (with Holder)
Assemble the controller according to the instructions and slip the holder over the loosened end pin. Attach the bottom bracket (holder “B”) so that the guitar body is sandwiched between the two holders and tighten both brackets so the guitar is sandwiched between the two. Note it may be necessary to insert the supplied foam cushion between the bracket and the guitar due to sloping of the guitar.
Be sure to attach the 1/4″ short cable to the GK-3 and guitar out jack.
Completed Installation
I hope this is helpful to you and that you thoroughly enjoy your Roland GK-3 Divided Pickup.
Here is a tune I recorded using the Roland GR-55 for the cello portion and along with a mic’d ukulele. Or Click here to check out my music!