Blog and News!
Evergreen Community Orchestra
Here are a few pictures from Evergreen Community Orchestra’s Sunday concert. The music included:
- What’s Up at the Symphony? (Bugs Bunny’s Greatest Hits)
- Star Trek Through the Years
- Harry Potter
- An der schönen blauen Donau, Op.314 (aka The Blue Danube Waltz by Johann Strauss Jr.)
- The Game of Thrones
- A Tribute to John Williams
A Musical Tribute to Comi-Con
Today I will be playing double bass with the Evergreen Community Orchestra’s fall concert, A Tribute to Comi-Con at 2:30 pm at Northwest Music Hall.
How long, O LORD?
Today’s Old Testament mass reading, Habakkuk 1:2-3; 2:2-4 really struck me. With all of the strife, violence and discord going on in the world today, both on our shores and across the world, this seemed very apropos:
How long, O LORD? I cry for help
but you do not listen!
I cry out to you, “Violence!”
but you do not intervene.
Why do you let me see ruin;
why must I look at misery?
Destruction and violence are before me;
there is strife, and clamorous discord.
Then the LORD answered me and said:
Write down the vision clearly upon the tablets,
so that one can read it readily.
For the vision still has its time,
presses on to fulfillment, and will not disappoint;
if it delays, wait for it,
it will surely come, it will not be late.
The rash one has no integrity;
but the just one, because of his faith, shall live.
As always, the Lord is merciful and provides the hope, the promise and the comfort.
RMC Hex Pickup and Poly-Drive Install for Roland GR-55 Synth Access
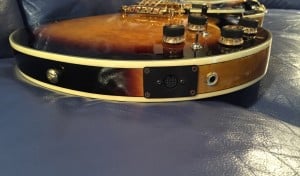
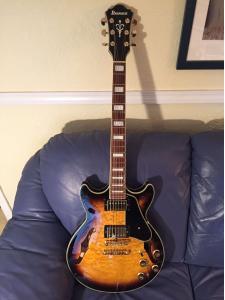
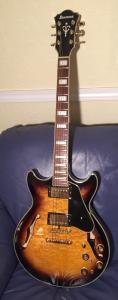
Here’s my recap of my process of upgrading my Ibanez Artcore Expressionist AM93 semihollowbody guitar with new RMC Pow’r Bridge ‘G’ pickups in the bridge along with the Poly-Drive 1 electronics module and all new control wiring.
Watch The Video
Overview
The synth access equipped guitars on the market, for example such as those available from Godin (LGX-SA and LGXT-SA) or Carvin (Frank Gambale FG1) were very attractive to me but cost more than I wanted to spend on a guitar. Besides I love working on things so I decided to do this upgrade myself and document what I did in case anyone else wants to give it a try too. I had already had a few years experience using the Roland GK-3 external mount pickup on my Epiphone “dot”, which worked great, but it was big and ugly. Sure, beauty is in the eye of the beholder, buy in my beholder eyes I decided I didn’t like it. Also, I had moved on to the smaller body (ES-339 style) Artcore AM93 and I wanted to keep it as stock looking as possible while still being able to enjoy synth access.
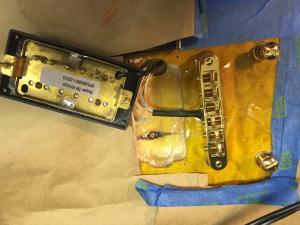
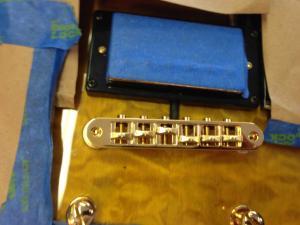
Perhaps the biggest challenge was the bridge. The RMC “PBG pickup saddles” retro-fit the Schaller GTM (Nashville) bridge as well as the TonePros TP-6 bridge, but they don’t fit in the Gotoh tune-o-matic bridges because the intonation screws are too high in the Gotohs. The bridge in the Artcore is called by Ibanez the Art-1 bridge and I don’t know who makes it, but I took measurements and determined that the RMC pickups would not fit. In the end, I decided to buy a Schaller GTM bridge, but the main problem was that the Schaller bridge posts/bushings were smaller than the Artcore bridge posts. I fashioned wood plugs for the holes and drilled them out to fit the new Schaller posts. This required very careful measuring and rechecking. Once it was verified I glued them in with Titebond hide glue. Be careful to wipe up any excess glue from the guitar finish!
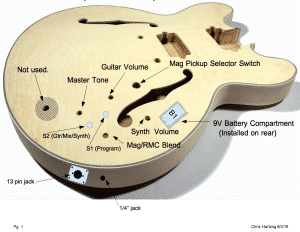
Before beginning any work, I carefully planned what I would do. Below is a copy of my proposed control layout diagram. I couldn’t find graphic of a blank Artcore body online, so I went with this one and about the only major difference is the extra hole on the top for the ¼ inch output jack which is on the side on the Artcore.
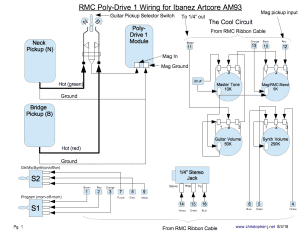
I also did my own wiring diagram that would be specific to my particular guitar. My install included what RMC calls the “Cool Circuit” which provides a master tone, guitar volume, synth volume and RMC/Mag pickup blend control.
Procedure
1 Bridge Post Hole Retrofit For Schaller Gtm Bridge
- Remove guitar strings. I discarded the factory strings as I had new D’Addario NYXL strings that I wanted to install when I was done.
- Remove stop bar. (It will actually slide off its posts as soon as you remove the strings.)
- Remove stock bridge. Set it aside until you are ready to replace the saddles with the RMC pickups.
- Extract stock bridge bushings. Place a short screw or bolt in the bushing hole and then tighten the bushing against the screw until the bushing lifts out of the hole.
- Measure bridge post hole diameter and depth.
- ID:
- Depth:
- Fabricate post hole plugs:
- OD: 17/64”
- Length:
- ID of Schaller bushing:
- Verify Schaller bushings fit in the fabricated post hole plugs.
- Re-verify post hole depth and plug length:
- Depth:
- Plug Length:
- Hole spacing:
- Install plugs and glue in place.
- Press in Schaller bushings.
2 Bridge Saddle Replacement
- Remove and replace bridge saddles with RMC saddles per RMC instructions.
- Remove bridge pickup and move it out of the way.
- Install Schaller bridge.
- Route pickup cables into guitar body.
3 RMC Wiring connections
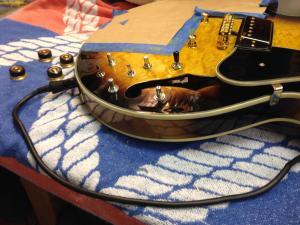
- Remove the volume and tone knobs. Tip of the hat to Sweetwater’s Insync for the helpful suggestion to employ the tip of a spoon as a lever to pry the knob up. Be sure to protect the finish with a cloth or napkin and pry gently.
- Remove the nuts and washers from the volume and tone pot stems, the pickup switch and the ¼ inch jack. (Save them in case you need an extra nut or washer later.)
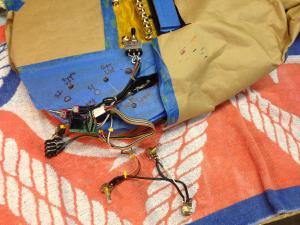
- Remove all stock wiring through bottom F-hole:
- Volume and tone pots. (Label the pickup wires)
- ¼” guitar jack
- Pickup selector switch
- Discard pots and ¼” jack.
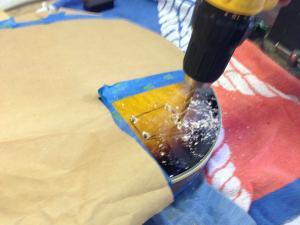
- Mark and drill holes for S1 and S2.
- Drill size:
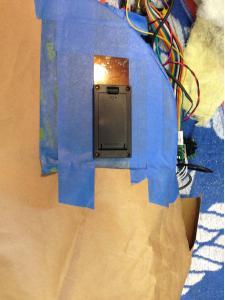
- Mark and cut opening for the battery box. (Note: it is not shown here, but I applied masking tape first over the areas where I needed to cut into the guitar to avoid chipping the nearby finish.)


- Mark side for jackplate opening.
- Make template for jackplate opening cutting/routing.
- Cut/route side opening for jackplate.
- Connect mag pickups to selector switch.
- Connect all Poly-Drive wires per RMC drawing.
- Connect mag pickup ground wires to Poly-Drive module per RMC drawing.
- Connect pickup selector switch to Poly-Drive module.
- Connect RMC pickup wires to Poly-Drive module per RMC drawing.
- Add cable tie down to secure inside guitar.
- Route battery wires to battery box.
4 RMC Wiring Harness Installation
- Insert Poly-Drive module and ¼” jack through F-hole.
- Attach module with two screws and ¼” jack with nut to dual jackplate.
- Attach jackplate to guitar with screws.
- Attach all pots and switches.
- Connect battery wires to battery box.
- Secure internal wires to guitar interior.
- Reinstall bridge pickup.
- Install strings.
- Tune and check string action and intonation.
- Install 9V battery.
- Test all functionality:
- S1: Changes GR-55 programs?
- S2 = Gtr + connect ¼” to amp: Mag pickups work?
- S2 = Synth + 13 pin to GR-55: RMC pickups work?
- S2 = Mix: Both pickups work?
- Guitar volume works?
- Master tone works?
- Mag/RMC blend works?
- Polish guitar.
- Create GK Set in GR-55 with setting applicable to RMC piezo pickups.
- Go play your guitar!
Artcore Bliss!
DB-14 Introducing the Korg MA-1 Metronome
Watch The Video Lesson
This is lesson DB-14 “How to Use the Metronome”, and is a continuation of my journal of things I have learned as an adult double bass student.
See the video for a few pointers about using the metronome.
Be sure to check out my Double Bass Lessons page for a complete list of all of my lessons!
Getting used to practicing with a metronome is really important. It will help improve your rhythmic abilities and improve your consistency of playing at a given tempo. And the more you practice with a metronome, you will find that you start hearing a metronome in your head at other times. You just become more tuned in to timing issues.
Make sure you can HEAR the metronome clearly when you are practicing. Either put it as close to you as possible, or connect it’s output to your amp or headphones, if you are practicing through headphones.
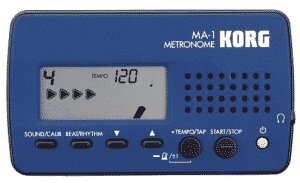
Be sure to get a metronome that is digital or allows you to change the tempo in very small increments. The Korg MA1BL Visual Beat Counting Metronome – Blue available on Amazon.com is a very good one.
If you don’t have one like this there are many metronome apps out there (“There’s an App for that!”) that work on the iPhone or other smartphone. If you have a smart phone you should have no trouble finding a metronome app. One that I use is the “Pro Metronome” by EUM available on the iTunes store.
By the way, the metronome measures tempo by beats per minute (BPM), therefore 1 click per second = 60 BPM.

